25/09/2022

Mixed Ork characters

 Palette cleanser again. I guess that little by little, this Ork side project is becoming quite a thing on its own! Today I'm just bringing this ooold Painboy (I may have painted it like, I don't know, 25 years ago? More?) alongside this Runtherd, courtesy of Iain from Caveadsum1471.

Vestiges of an era

Besides, I had this other Runtherd mini repeated!

Again, I painted the left one in the mid 90s. Gasp!

I had no use for a third Runtherd (I guess I barely have use for two of them!), much less for two identical minis, so I converted the unpainted one into something different:

Hiya! Havin' fun with a gun!

I went for a straightforward paintjob, so this is what I got with the Painboy:

Totally not a psycho face

I have to admit I failed miserably with what you are about to see. Instead of the classic glyph of the saw used for Painboyz, I tried to paint some kind of wicked Caduceus, with an axe instead of a staff and membrane wings. It is awful, but I'm keeping it anyway, as a reminder for future me. Someday I'll do it better.

That worked better than a Red Cross, anyway

Now I guess I have two Runtherds:

Those are not Snakebite Clan colours

He looks more like a circus artist than a Runtherd

Of course after my recent failure I didn't dare to innovate, so I painted the classic whip glyph that identifies the Runtherds.

Yeah, those are supposed to be ideographic representations of whips

 I'm afraid I do not have enough Snotlings or Squigs to justify having two Runtherds, so I guess I'll have to solve that... (Sigh)

Anyway, have a look of the converted Runtherd. I made another conversion and got him a longer barrel for his gun, now he is the heavy weapons guy from his (future, yet to be gathered) mob:

Separated at birth

The back plate is still empty. Whenever I paint a mob for him to fit in I'll decide what to paint

Better view of the angry gun

I believe I got myself into more trouble, knowing that now I have to get Snotlings and paint more Orks! Ahh, little by little, step by step...

17/09/2022

Totally not abandoned project

 I bet you had forgotten about my mining town vertical board. I can't blame you, it's been nearly two years since my last installment. Shame on me!!

The good news is that I'm finally back to work!

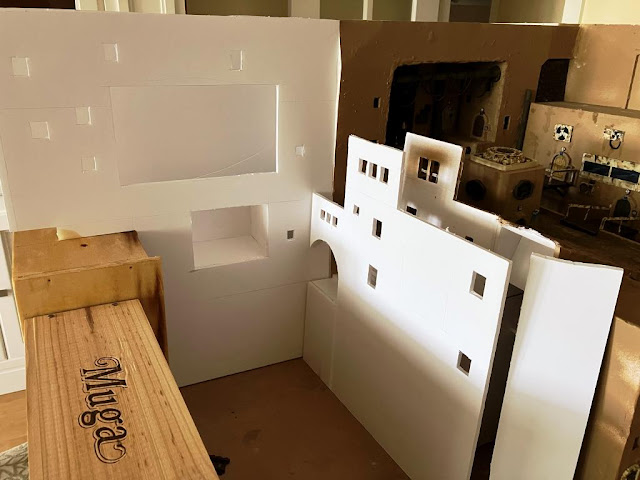
A brief reminder of the last pic published:

As of December 2020

The next stages will be necesarily slow ("Even more than now?" I hear you scream). There is a lot of planning involved now, as I need to fit in a lot of elements, and space is beginning to be scarce for all the stuff I want to stick in here.

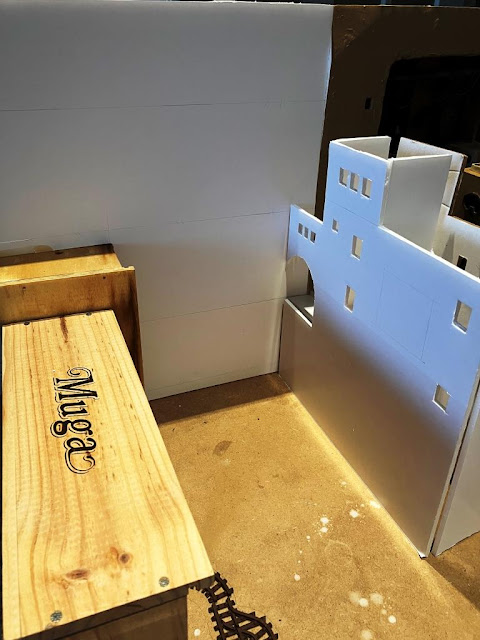
So well, one step at a time. First thing, I needed to take care of the left end of the board. It's the part that will usually be down when the board is storaged in the cupboard, and so it will be taking quite a share of the weight. Mere foamboard structures seemed too fragile, so I needed something sturdier. Fortunately I had these wooden boxes, and after some tests I crossed my fingers and decided that they will do.

I had to drink the bottles of wine first. You know, sometimes you have to do sacrifices

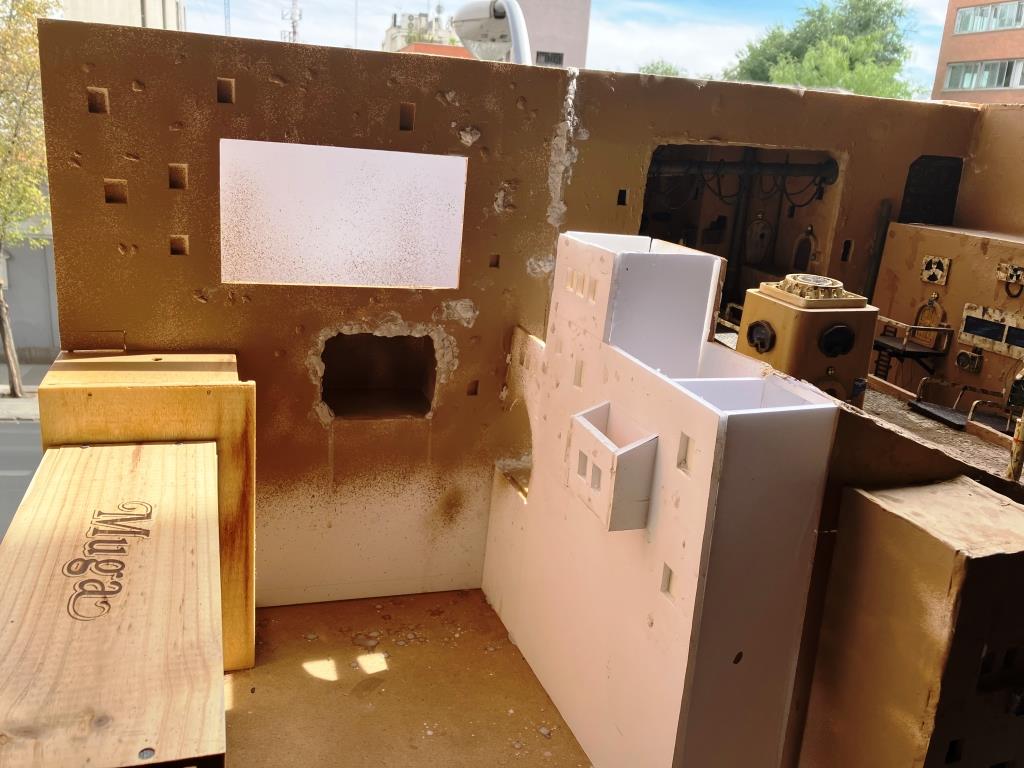
You can see now the structure is "closed". The large foamboard piece in the back is a mere continuation of the board and will allow me to build the backdrop. Or whatever you choose to call that part.

In the pic below I,ve added another piece of foamboard to give depth and I have tested how these tiny rails will look.

After all I guess we'll need a mine in a... well, a mining town!

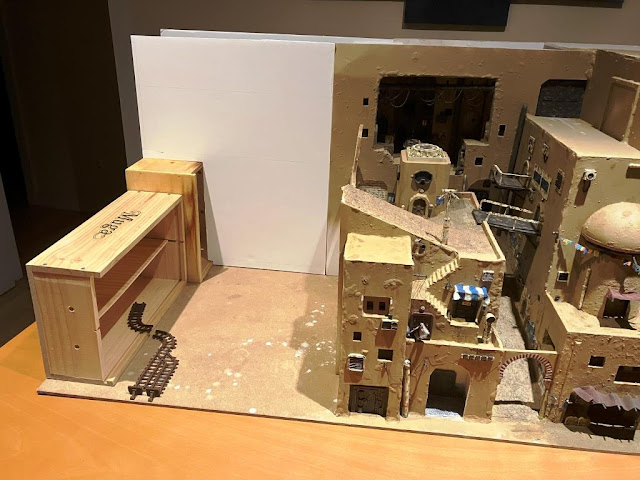
The rails come from the Terrain Crates ranges by Mantic Games. My general idea is to make the access to the mine over there somehow. The exact details are a problem for future Suber, but current Suber has enough issues to deal with just now.

For example, I need to connect the existing board with this new section. Though my original idea was building stairs both up and down, I had to admit it was too ambitious (it made the section unplayable, as there would be no room left to put the minis in, much less to handle them or to play). So I settled with wider stairs down:

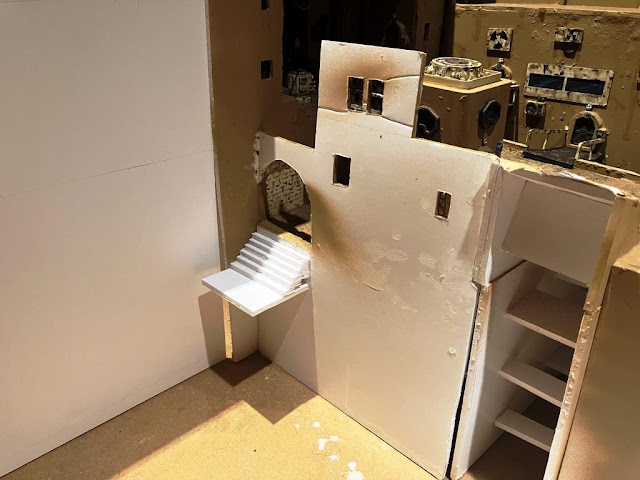
And that kind of configured my next decisions

I closed the building by adding the facade and closing the archway with the stairs

Nothing is glued yet

Then I gave some shape to the "backdrop" (whatever), carving more caves and windows:

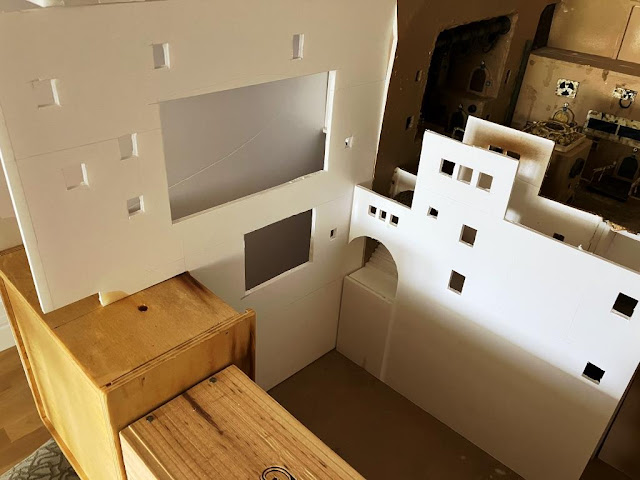
Just repeating what I had done in earlier stages

Now I see that these caves are way too regular in shape, but we'll come back to that later. At the moment I was simply defining spaces, thinking I was doing it right and trying to get all the pieces along, while playing mental chess and making decisions three steps ahead.

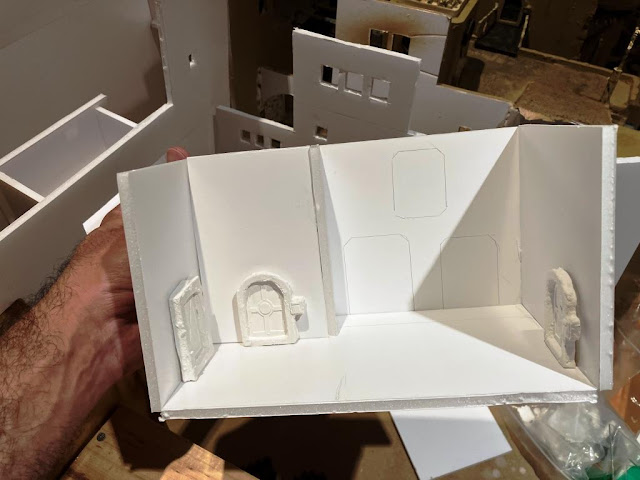
Step by step. This is the basic configuration of the lower, smaller cave:

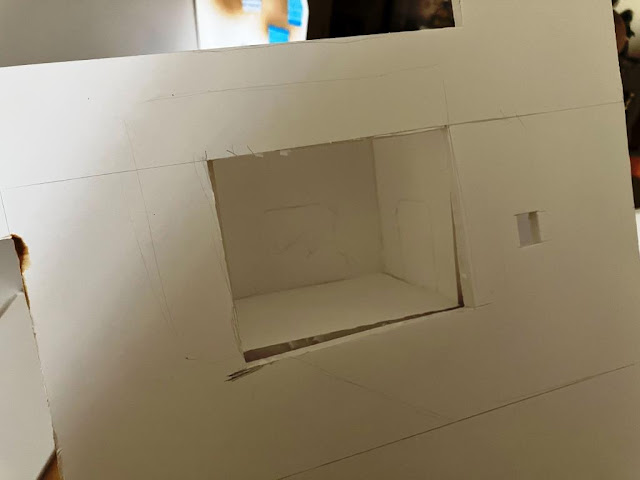
There will be doors and stuff. Eventually

Ahhh, enjoyable megalomaniac views

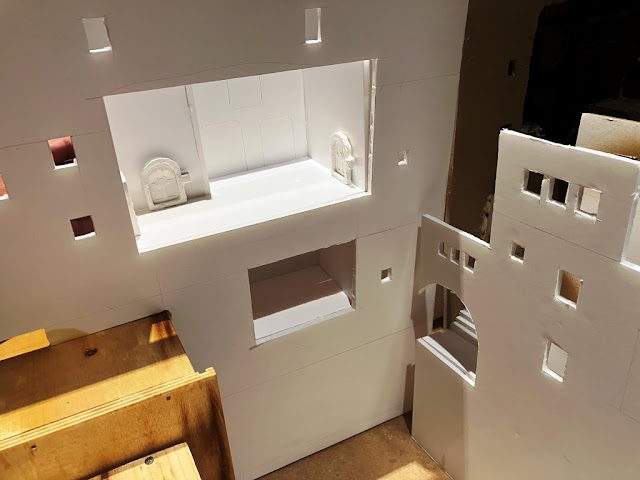
This will be (more or less) the upper, larger cave

I insist in making them playable, so they have to be accessible. It forces you to make boring decisions, but you don't want to get your hand stuck in the board!!

In my mind it all makes sense, promise

So this is more or less the basic shape of the rear part. Very crude, I know, but it serves my purposes now. I have a general idea of what I'll be doing in that center space left and about the access to the mine. But before I get there, I have to do tons of work first!

Some texture, the same method I've always used

Texture within, texture without

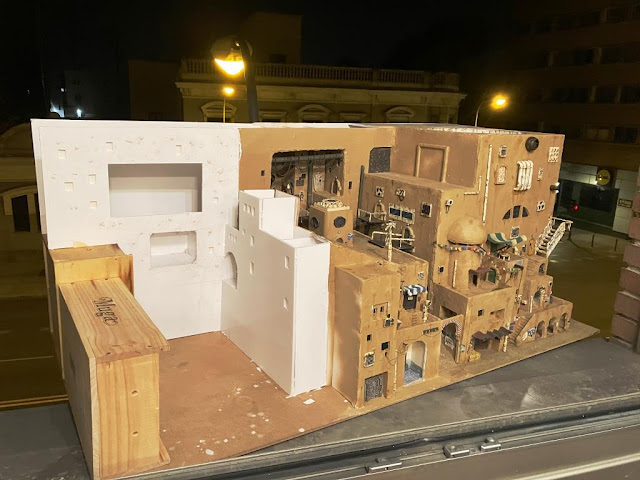
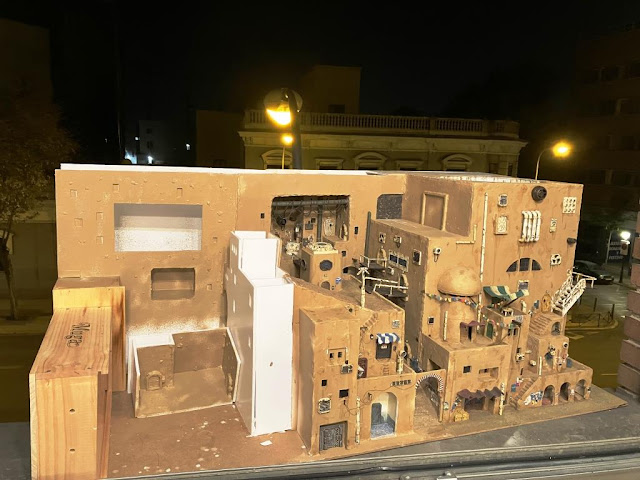
Of course at this point this monster is beginning to be difficult to handle (beginning, ha!). However, now it's the moment you take it to the window in the middle of the night, as the deranged madman you have become by now.

Mwahahahahaha!!

I've been using a Montana94 spray for this board. I'm afraid it died while priming this, but of course it was half full (yes, I'm an optimistic by nature) and above all, I hadn't used it in almost two years. So all in all, its performance was better than anyone could have expected.

Kind of finally taking shape!

However, there was a thing that was really bothering me. As said before, I was getting the impression that this was all way too regular. Yeah, I've seen perfectly vertical rocks and perfectly shaped caves in them. But this all looked too artificial, too square. So I was slowly making the decision to make some rougher edges and irregular shapes.

You get better ideas in the daylight

So I spent the little clay and little spray paint I had left and the board looked like this:

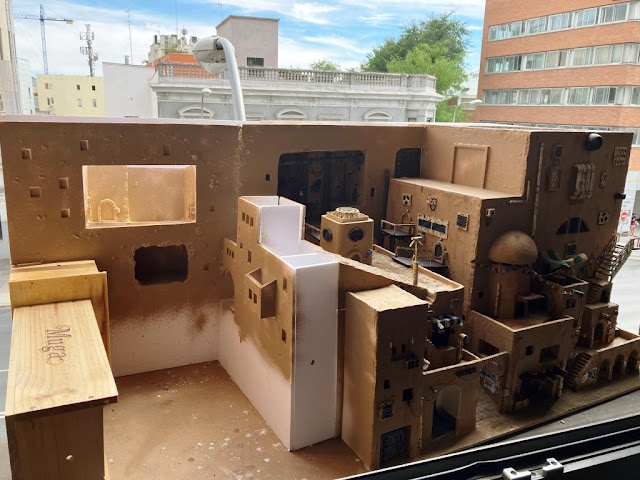
Crude WIP, yet visual

This is it for now! I'm planning to reshape the square caves, and I've done some experiments with stairs and stuff to make them accessible to its dwellers. But that all will have to wait for another day. The most important thing is that I've resumed production and I'm full of ideas and will! Of course real life will dictate my tempo, but for sure next installment of this won't be in two years time!

Cheers!

08/09/2022

Tactical tractor

 A tiny interlude today, some kind of palette cleanser, or even mind cleanser, I would say. A quick and easy (oh, surprise) thing just for fun.

It was an opportunity project. The Suberlings had two of these:

And of course they play with no one of them

It's a tractor from a plastic ball toy capsule vending machine (if that thing has a name, I don't know it). Of course one of them had to be confiscated. It was just perfect for my backwater world ambientation.

First thing to do was to fill the gaps with mere cardboard:

Less is more

Then I started to add random stuff from here and there, to give it a kind of sci-fi vibe:

Anything works

Just add glue and throw stuff at the tractor

I didn't really wanted to give it a hard WH40K feeling. Skulls. Gothic. More skulls. Nah. More Rogue Trader, less 40K. A bland sci-fi looking would work good enough, specially considering that the tractor has a lot of curved shapes. Making a transition towards current 40K would mean a lot of absurd work. It simply wasn't worth of it. I insist. Less is more.

So let's lick some paint on it!

The primer worked way better than expected, it was my main fear, to see paint flaking all over. But it was just perfect. I painted the driver's seat first:

Once again, simple but efficient. Not good. Efficient

How would I paint it? Well, if you've seen my previous post, you might have observed I used a lot of green!

So I was on a row! Same recipe

Of course the secondary colour had to be yellow

Then it's just a matter of details

Yup, it says Iohannes Cervus there. Yes, tm, of course

I don't know if the Iohannes Cervus is taking the pun too far, but I had to do it :D

The driver was kind of an issue. I didn't have any proper seated mini, so I had to improvise:

Bits from one of my old civilians and tons of green stuff

I wasn't able to put him with his hands on the wheel or anything, the pose didn't work. So I thought of some kind of low tech weapon. I combined a crossbow with some other bits and called it a day.

My first option was a regular cap, but the hat with earflaps was too tempting to let it go

Regular industrial blue for the jumpsuit and little thing else

The guy on his seat looks like this:

Hum. Ya dammit rodents, get outta my crop field!

Added some additional wires and stuff

The purity seal is the only 40K specific bit here, I think

The final step was the rust and weathering effect. This thing has gone through a lot, so it cannot look clean and sharp!

This tractor has been in my family for generations. And generations. And generations. And...

Yeah, got it Mechanicus certified each decade or so

Look, it even has a purity seal, the machine spirit is at ease

Most trusted piece of tech this side of the galaxy

Most sexy rear view in the Eastern Fringe

I don't have a real use for it in terms of gaming, but it makes a nice piece on the board, even if it's mere scenery.

Oh, but of course. Once you have a tractor, there are some things you have to do. Have to, I say. The following pic is absolutely necessary.


Local farmer overriding the military power of the Imperium. Pictograph taken c. 994.M41