30/08/2023

Guards! Guards!

 In case you are wondering, I'm not talking about the Discworld book.

Today it's all about these loyal fellas

I got a second hand RTB07 Imperial Guard box a lot of years ago (I mean a lot!), and it was about time to finally get them painted!

I once had an Imperial Guard army (a tiny example here), but sold it quite a long time ago. If I was to start it over again I wanted to go in a different direction, so no desert camo pattern whatsoever. I truly felt I had to go full Rogue Trader with them.

So grey it is!

You all know this pic, but just let me bring it back for reference:

Basic idea, but I'm taking some licences

I have the impression that the sculpt is meant to depict a jumpsuit with shoulder and breastplates more than a vest over the fatigues, but honestly, the black vest idea looks much more better, so I'm sticking up to it.

Basic colours

Agrax all over

Getting to somewhere

The highlights are too much, I know. I expected this Vallejo grey to look a little darker when dry, but in the end I worked with it. I only provided two highlight layers instead of my usual three, but I hope it's enough.

At this point I have to say that I was painting three 10-men Squads, but I had no Command Squad at all. I had a look at eBay looking for the old banner bearer (oh, how I do regret letting that mini go!) and some other minis of the like, but the prices were simply absurd. But the box provides 36 Guards (quite an odd number!) so I had six spare Guards...

Just need four to build the Command Squad

Medic, special weapon, comms and banner

Oh, well, you are right. It would have been a fantastic idea to plan this in advance and paint these alongside their other damn thirty colleagues. That would have avoided repeating the whole process for just simply four minis. Well, apparently I'm not such a good planner, what can I say.

On the other side, I'm quite proficient at paying attention to absurd, ridiculous details nobody cares about. For example, military insignia, ranks, badges and how to convincingly apply them to my models. Let's talk about the circle badges on the breastplate, for example. I'm most definitely not using the colour code in the illustration above. I had come to a solution years ago for my first Imperial Guard army, so I am following it again, of course. Vertically split badge, using two camo colours, identifying the Platoon and Squad numbers:

2nd Platoon, 1st Squad

That still leaves me the issue of the Company badge. I first thought of the shoulderplate (as in the illustration), and even got some decals to give it a try. But I didn't see it. With this black and grey pattern, such a white number/icon/whatever would draw too much attention.

Didn't really want a white number stand out that way on them

So I came with a more military-looking solution. I simply painted a black badge on the shoulder pocket with the Company number on it.

Now that I think of it, I should have done the same on the other arm with the Regimental number. Hmm...

For the same reason I painted the rank on the shoulder in grey. My first instinct was to do it in yellow, but it was way too visible.

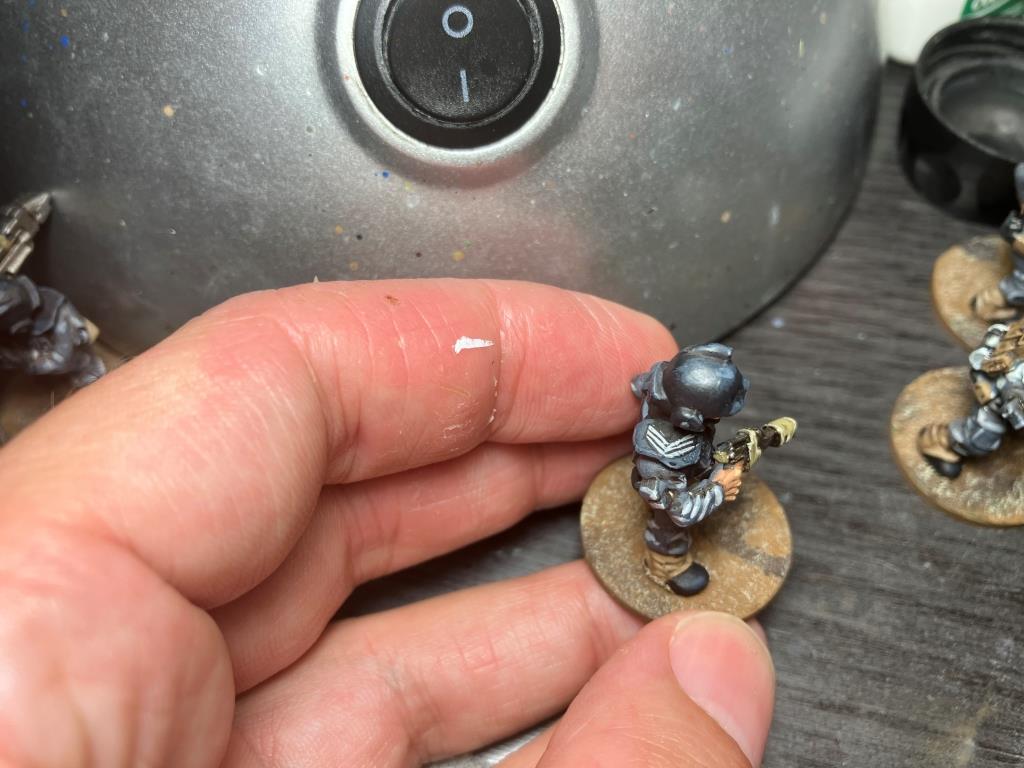
Only for Cpl and Sarge. Should do the same for Pvt, I guess... Hmm...
 

Anyway, if there was a place to add some colour, it was the banner. This Squad is the Company Command, so the banner shouldn't be too flamboyant, after all it's not the Regimental Banner. I drew inspiration from my previous work on my old Guard banner (the one in the link I provided above, here you have it again just in case), but kept it way more simple, I thought it was better this way.

Less is more
 So now I have a Company Command Squad and three riflemen Squads. Quite a Codex compliant basic force. OK, the OCD in me drives me to an uneasy conclusion. I have a Company Command and a three squads Platoon. But I do not have a Platoon Command Squad. You too see the gap in here, I hope!! Well, that will be a problem for the future me. For now here you have the three riflemen Squads...

2nd Platoon, 1st Squad

2nd Platoon, 2nd Squad

2nd Platoon, 3rd Squad
 ...and the Command Squad:

Oh, BTW, I tried the classic skull on the badge

 I have added this Captain and a Commissar so this Command Squad has proper... well, command.

The Commissar doesn't need to be embedded in here, but anyway
 If I was to build up an army (which I'm not!) I would require a Command Squad per Platoon, as said, and kind of at least three Platoons, as well as heavy weapons and logistics. That would sum up an Infantry Company, which is what I had back in the day, but I'm not going back there. Honestly, if you are playing a 120+ miniatures army, you don't want to play WK40K, you want to play Epic.

That will come too. But not today.

Ahem.

For now, here you have the whole batch!

It had been a long time since I hadn't done this kind of mass painting

I know, I know, I have to provide a backdrop!
 This will be it for today, but I can tell you these chaps are going to see some action pretty soon! They're already singing this classic:

Another day nearer the battle

So drink up my lads and look brave,

'Cos everyday nearer the battle

Is another day nearer the grave.

20/08/2023

Second second board

 New installement in my second attempt of building boards for Underworlds!

I had quite a clear idea of what I wanted, so the first steps were more or less pretty straightforward. First thing, put the two half-boards together. I glued them to another MDF surface:

Here we go again!

In case you wonder, I of course could have used only the below MDF piece, but having the laser cut hexes is an enormous time saver, so it all was quite a no brainer for me. This approach came with its own setbacks, but I'll get to that later. For now let's just move forward. I wanted this board to have a rod as main element, so I just made it with DAS clay:

It could be a river, but it's a road, trust me

I used a roll pin to provide texture, nothing too complicated:

Walls, floors or roads are all the same to me!

And then I just marked the hex grid on the road:

There are tiles in the tiles

With this, I could say that I had the main element in place. From now on it all was a matter of embellishment. I knew this was the best moment to bring these beauties back:

As first seen here

I wasn't sure of what exactly to use, but here you have my first take:

I would change my mind later on, but you get the idea

As I told you before, making these boards stackable is a must. It's my true priority. So any sign or any other piece of scenery could not be excessively high or, if that wasn't possible, then it had to be removable.

So the signs were to be added on a game by game basis, I just made room for two of them and that's all. Apart from that, I wanted to use some ruins. I had these Age of Sigmar pillars, which I cut at maybe 1cm high. I then provided the same heighth for any other element on the board, ensuring that another board could be stacked just on top on this one when storaged:

Better explained here. I have four support bits of the same heighth

But this is how it's going to look when gaming

Well, let's get dirty! Some sand and gravel...

This is where you have to rememeber to not cover the grid!

Oh, by the way. Cutting the pillars away is quite a [redacted] of a job. I thought I could press mould the pice for the future:

The hole on the top is to make the upper piece fit in there

Unfortunately, I didn't take the right precautions and I broke the mould on the first piece... and had already glued the orginal bits on the board. So I may have to repeat the experience to see if I can get it right, I hope it will spare me quite some time in the long term.

Let's splash some browns on that board:

Well, all the browns you have. Don't be shy

Now let's tone it down a little:

Ugly wasteland

I painted some puddles and the Wyrdstone I use to indicate the starting tiles in the game. Here you can finally get a proper idea of the board I had first envisioned:

Still ugly and still a wasteland

In order to make it coherent with the first board I already had, I added some grass:

I also partially covered the road, to show the decay and so

Some flock, small branches as fallen trees and tiny leaves

I guess there's nothing else to add, just have a look at the finished board, ready to have a game on it:

It's almost the same pic as above. Spot the four differences!

A few close-ups. There's one thing I regret, I should have added some more variety on the slabs of the road, as I've done other times. I wanted to get the board done and move on, but it bugs me. I may have to repaint them so there are some more colours and not just plain broken white


Anyway, it serves its purpose

The signs are painfully Warhammerical

This is how a game will eventually look like!!

A general overview of the finished thing:

 I also have to paint the edge of the board. It really looks awful this way.

 So now I have two boards! Though limited in my options, I can have a game again!

Oops, what's happening here?

Here you can see the issue I mentioned at the beginning. After having glued the two half-boards to the MDF large piece underneath, I experienced some serious warping. I've been cautious, as I don't want to break the board now, but I've learnt that I need to use less glue or to explore other solutions. Anyway, as I said, this is finally game-ready:

I really want to make the real thing

Finally, the relevant issue. How flat is actually the board?

I can work with this. Now these are stackable

I think I can build the other two boards and still be able to storage them, which is really a concern for me. If you are willing to follow me on this adventure, just stay tuned!

12/08/2023

Twilight of the Summer

 Making up titles for these posts is becoming increasingly challenging. More World of Twilight today!

These belong to The Kedashi Swarms KS campaign, which I have been into for some time. I had to split it into small batches and now here you have some more lysergic lizards! (Hmmm, note to self, I have to reuse that catchphrase as a title in some future post...)

These are the Abrok, some fearsome creatures indeed. Quite strangely, when I first saw their terror bird looking, I immediately got a Tzeentch vibe, and I could not get away with that idea. As much as I tried to envision any other thing, the Lord of Change kept on whispering on my ear, and I knew that it was pointless to resist. I went for a deep blue palette turning into purple and eventually to red. I used both red and the yellow dots to set my path apart from a pure Tzeentchian approach, but I guess you could use them for that setting if you really needed to do so...

Can you hear them? Listen: Chhhnge! Chhhnge!

The thing is that you can take all the terror away just by sculpting these beauties, the tiny offspring of the Abrok. Now you could not fear such a cute family, could you?

It looks like that tiny Akitii is about to become breakfast!

Next thing is this "Garkrid Infestation" pack. As usual, I didn't want to visit the official World of Twilight web before for any reference, as I don't want to get my own vision conditioned by other people's art. So, for my own interpretation of the sculpts, I soon thought of them as kind of larvae sprouting out of their cocoons. Using this palette, with fleshy and purple subtle washes, I wanted to emphasise that aspect and make that carapace to look soft and squishy:

You should be saying eeew with disgust right now

The Naralon Critters pack is quite an eclectic one, as none of them look any similar to other. They are just dwellers of the forest, so you can populate your board. I tried different colours, but for that Zazu-like bird, which I painted just at the same time that the Abrok above (but man, I do like the pattern!)

Three critters get into a forest...

The Howler on the left on the next pic is quite the very first exception I think I've done in all these years, as it's the first time I'm using brown (or any other earthy, 'natural' colour) for any creature in this project. But once again, it was once of those things you just see when you have the mini in your hands for the first time.

Looking definitely strange in a colour that actually exists in nature

The last one is the Swarmcaller, the fella who can summon the creatures of the forest to do their bidding. I'm afraid the pic below has burnt the colours, I swear the cloth wings have quite more variety of tones.

Least impressive swarm ever

This is it for today. Let me finish with a group shot:

About time to use that board. Now I need a backdrop

I still have some minis from this campaign pending, so be ready to expect more!