Once I've finished the monstrous Gargant, I'm clearly in the mood for much smaller stuff. I can't face another large project right now, so I believe I can take the opportunity to paint single minis or any other kind of standalone project.
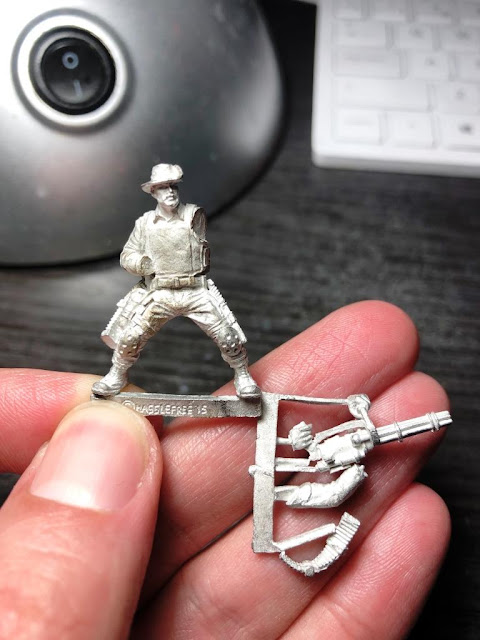
My palette cleanser today will be this "Ace" by Hasslefree Miniatures, a mini that have been waiting for some time to be painted:
 |
| No, not Blain. Ace, I said |
I've heard that Hasslefree has been experiencing some delivery issues for some time now, but to be honest, it's been quite a long time since I last placed them an order (you know, my mountain of shame doesn't allow it) and I always got the best of them.
Whatever the case, the sculpt is simply magnificent, as usual. It of course resembles Blain from the Predator movie, though it's not an exact replica of the character.
I tried to get it as close as I could, so it meant those 80's Woodland fatigues:
 |
| It took me like two or three tries to get a green I was comfortable with |
Painting camo is always tricky. If you do it right, it will work and you will see a blurry object with no definite shapes (as that's what camo is supposed to do!). But you can't forget that you are painting a mini and that it should look good and distinctive on a board!
 |
| I most likely won't achive neither of both goals |
I used a soft green on all the other gear. It makes some shapes recognizable, I hope, but the camouflage itself is still there.
 |
| A mess of greens and stuff |
I finally made the kneepads, boots and weapon with different shades of black:
 |
| The Ol' Painless |
Little else! Here you have the final result:
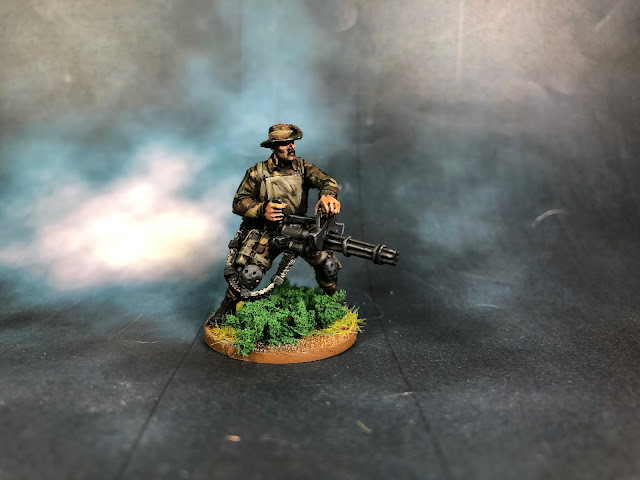


I have to say I was much happier before I saw the pics full screen, it makes all the mistakes awfully apparent :D
Anyway, quick'n'dirty job, so I'm happy with what I got. Let's get a comparison shot
 |
| Wait, are these two even the same scale? |
I'm quite satisfied with having painted anything in kind of a week's time. It feels strangely good! I guess I'll paint a few more standalone minis before I come back to full units or whatever. Who knows!