I'm back with a new scratch building project today! These things are addictive, you know :D
This time my inspiration comes from long ago, from the Big Hero 6 movie. There are some really pretty cool designs that immediately caught my eye from the beginning, but I'm focusing on one of them today. I'm talking about those large, bulky floating things you could see over San Fransokyo:
 |
The pic's quite revealing
|
What were those? Well, it didn't really matter, they looked cool! In time, with some research, I did learn that they were supposed to be wind-energy electric generators, just in the fashion of windmill generators, but in the air, getting the air currents and making the most of them.
Not only that. I even saw that there are some current actual prototypes!
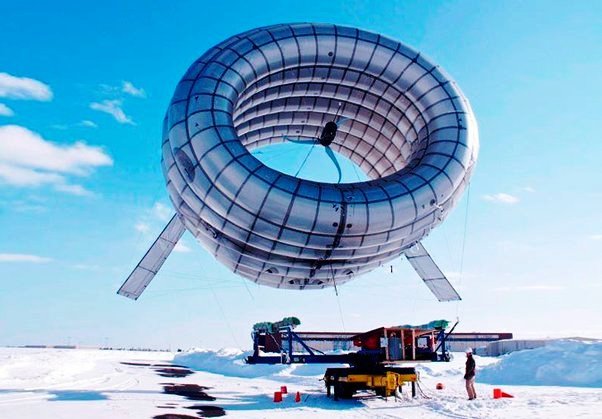 |
Not as cool as the Japanese looking ones, but you can't have everything
|
OK, all the intro was just to let you picture the idea in my mind. So now I'm daring to populate my board with a couple of those! They would look cool (at least I was expecting that) and could make sense (kind of) on my barren desert ambientation, where you get the resources where you can get them!
I could do with one, but it would be too lame. Of course I couldn't build dozens to make a display like the movie, but I thought I could manage to have at least a couple of them.
I had to face an important challenge first, and it was regarding the verticality of the project. It all depended on my ability to build a floating-looking structure. For that purpose I needed some wire to bind the turbine to the land structure. But it of course had to take a little weight. I had this at home:
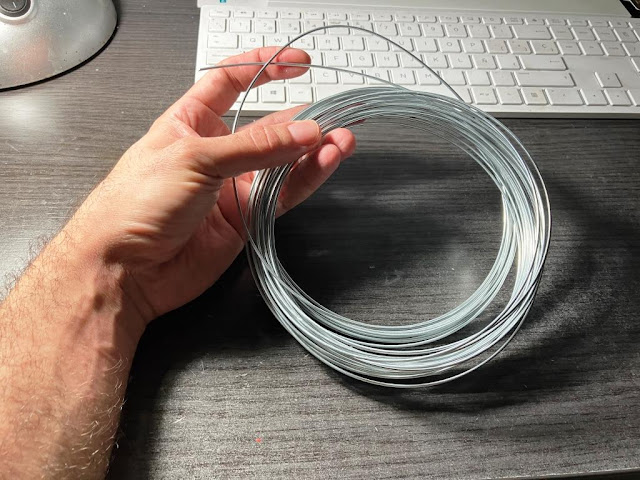 |
I hope I won't be needing everything
|
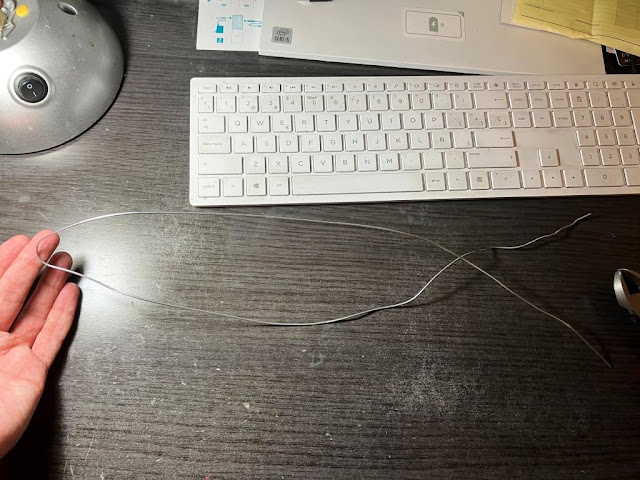 |
Something like this would be enough
|
Now the real test. I got the wire on the drill and got the other side with the pliers. I gently let the drill braid the wire and... It worked! The following pic is just for the show, to let you see the process:
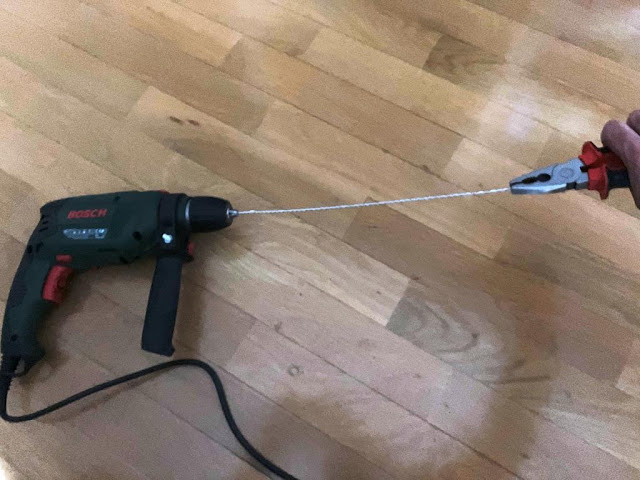 |
I wasn't able to take a pic while doing it!
|
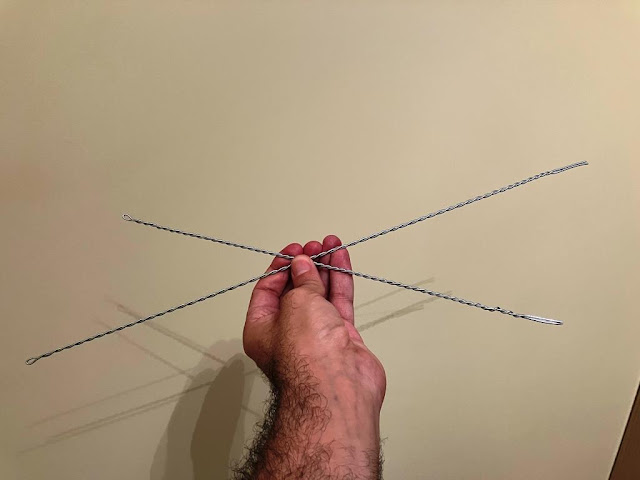 |
I did a couple of them, different sizes
|
I guess you can try doing it by hand, just with pliers, but I don't really think anyone can get a regular braid and for sure it's not worth of the effort.
The wires looked strong enough to hold some light weight on them, so that was the moment I felt confident enough on the project, that was when I finally thought this crazyness would be feasible.
Once I had the green light for the rest of the thing, I started to look for bits to build it all. My main (and essentially only) guide to select any piece was having two of them!
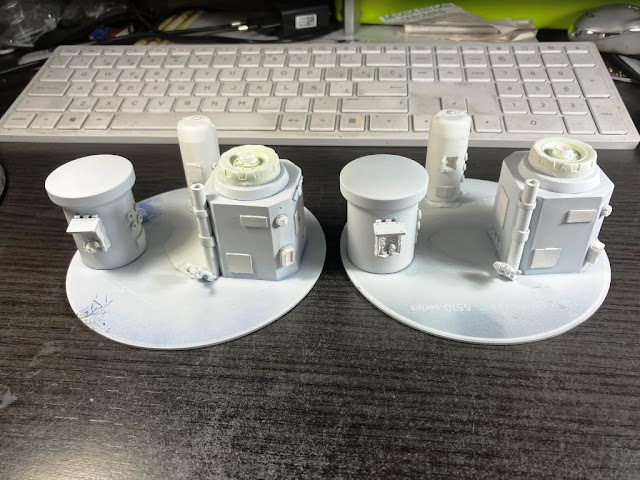
I started with the electrical transformer. Or whatever I had to build on the bases to keep the turbines attached to them.
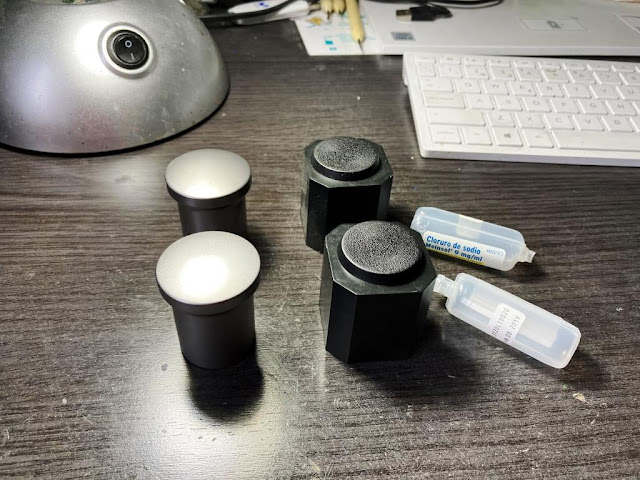 |
The old trick of cologne tops will do. A couple of GW bases and saline solution vials as a complement
|
 |
Card, plastic bits and random stuff, but trying to make them identical
|
 |
Classic CD bases. Good thing I didn't get rid of those
|
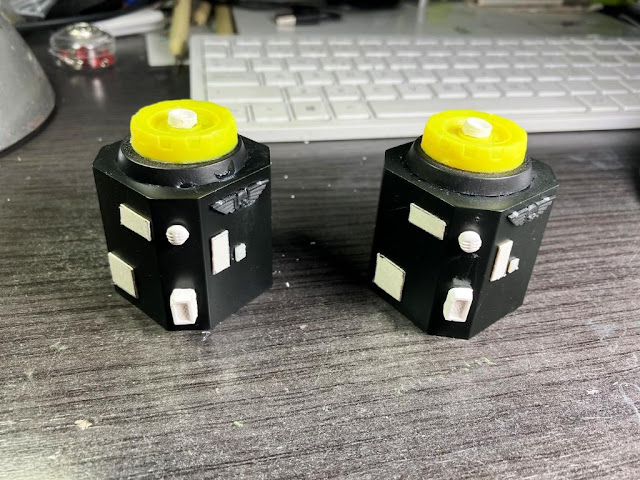
These will serve as the main units for the transformer. I'll use the other pieces as control panels or something like that. I keep some copies of the panels I scratch builted for my mining town board, so I can use a few of them here:
 |
Wasn't sure if I was to finally use the vials
|
The good thing of the soft plastic of the vials is that I was able to cut through it and place the control panel in the inside, something I cannot regularly do on most rigid surfaces.
 |
Crude and shabby. I don't care, that's the way we like things in the Dark Millenium
|
This is more or less the final disposition of the bases. The hollow rods will hold the wire of the turbines, but we'll get to that in due time.
 |
What a pile of junk
|
 |
What a pile of white junk
|
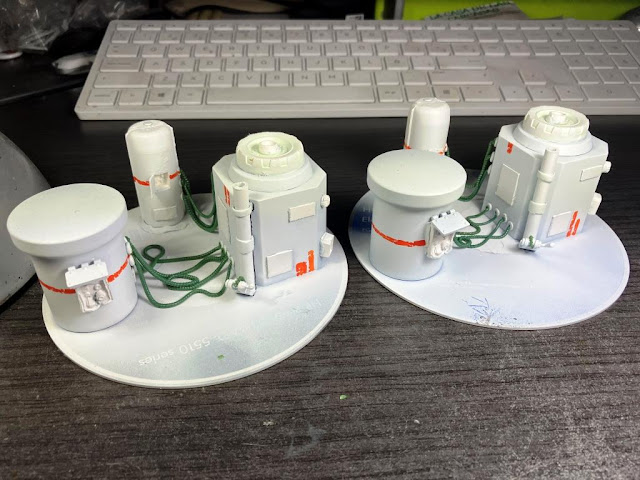 |
Some markings and greenstuff cables
|
 |
| It might not look refined, but I'm most definitely not aiming at it |
Let's have a look at what I said about the wire:
 |
Okaaaay, looking weird
|
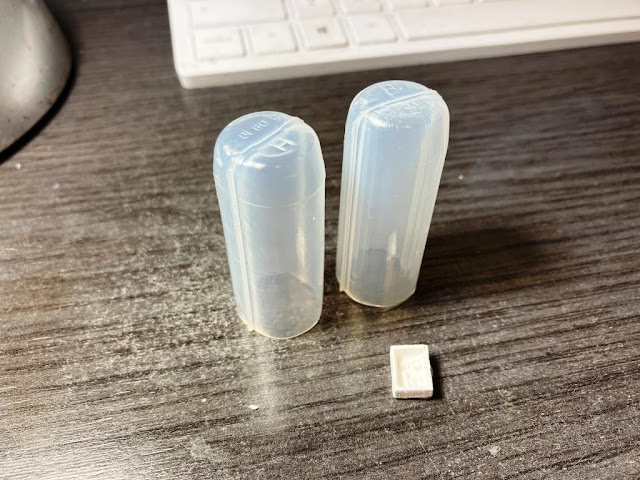
Just a planification issue. I knew I was to use Kinder-like eggs for the turbines, but I wasn't sure of the size, so I made these tests. It would have been preferable for me to use regular sized ones. They are lighter and I have like dozens of them.
 |
General raw look of how it will look in the end
|
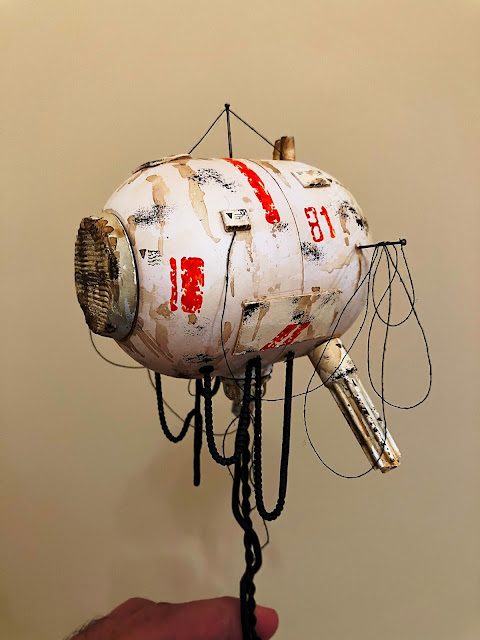
But I had a couple of really big eg...ahem. What an unfortunate choice of words. Please let me rephrase. I also kept two pieces of larger size plastic ovoids that would also fit in the idea of this project.
 |
I mean this
|
The larger piece looks better indeed, that's out of question. At the moment I wasn't sure about the weight issues, but we'll discuss that later...
For the moment let's start weathering:
 |
First layer of dirt
|
 |
Second layer of dirt
|
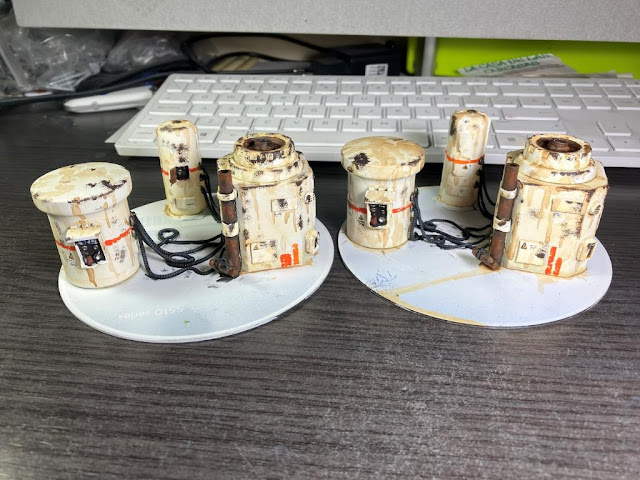 |
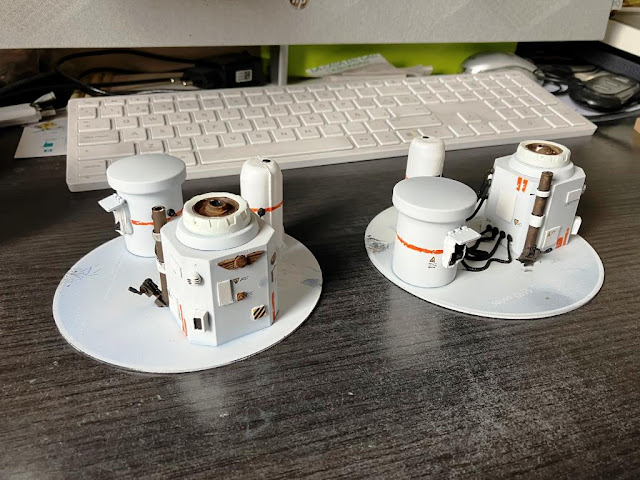
Third layer of dirt and rust
|
I'm aware it's kind of difficult to find that level of rust in the desert, but alien deserts can be quite whimsical. Let's assume there's some level of moisture in the air that can cause that. After all, I built a moisture vaporator for some reason...
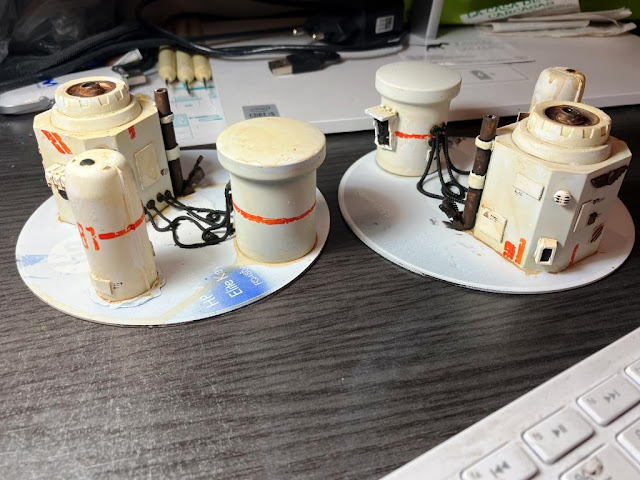
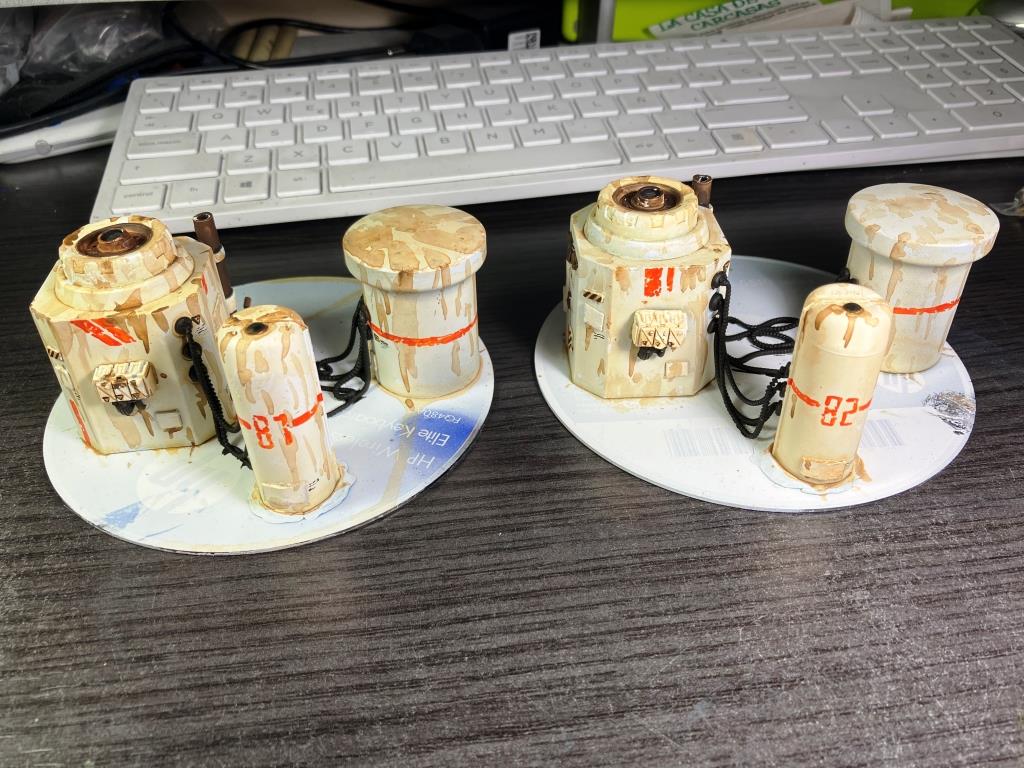
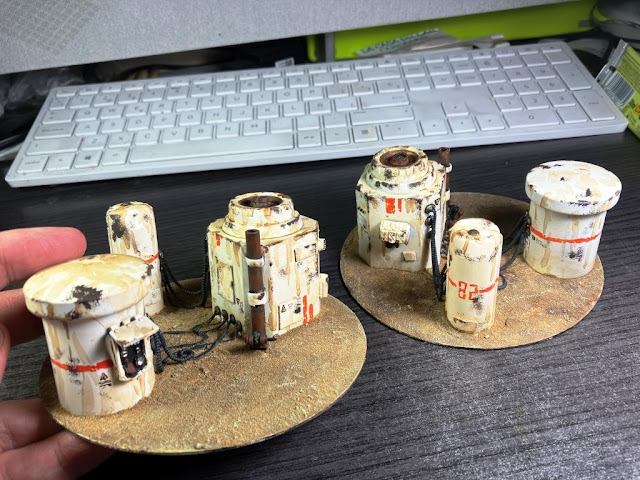 |
Done! The two bases are identical, you are seeing two different angles
|
 |
| Close-up |
Well, with stage 1 fully finished, I moved back onto the wires. I had to work on the way to fix the wire to the turbine itself. It had to be detachable, for storage purposes. I used this piece from a spotlight, from the Imperial Guard vehicle sprue:
 |
The spotlights themselves are now part of the Tranquility (or whatever you choose to name her)
|
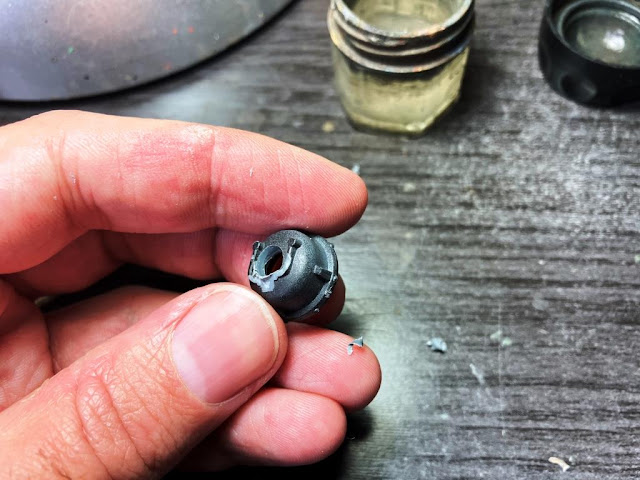 |
I drilled a generous hole, as the wire has to go through it.
|
I kind of filled the "cup" with superglue and green stuff and placed a magnet on top of it. It's exactly of the same diameter, so it was all perfect:
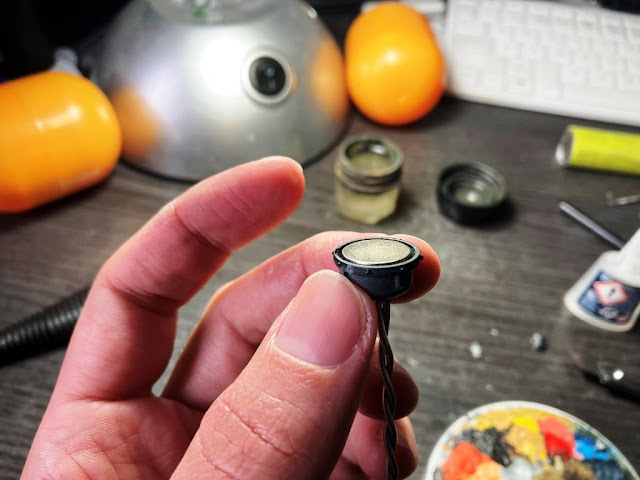 |
This project is growing increasingly complex
|
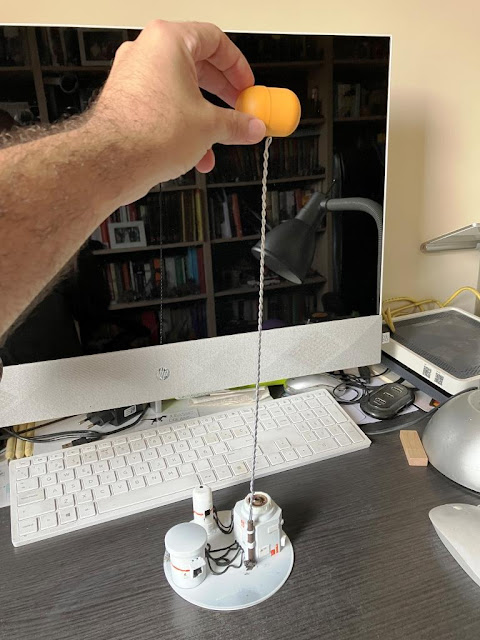
The other end of the wire is to be just stuck into the hollow rod on the base. Everything is designed to be detachable, as you will immediately see in these test pics that storage is going to be quite an issue:
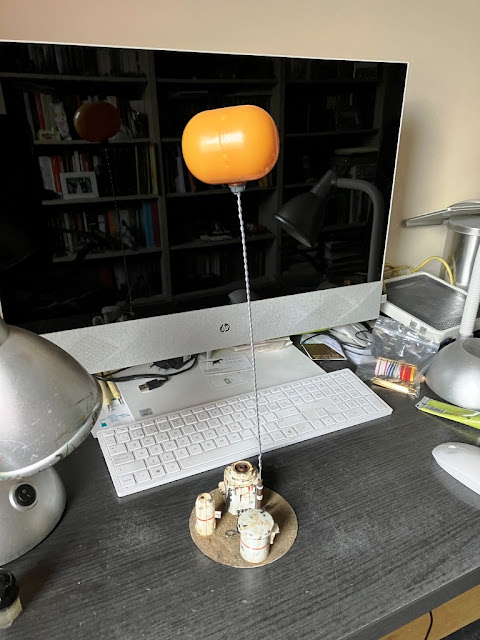 |
The test with the short wire looks nice. Let's see what happens with the long one
|
 |
| Oooooops! |
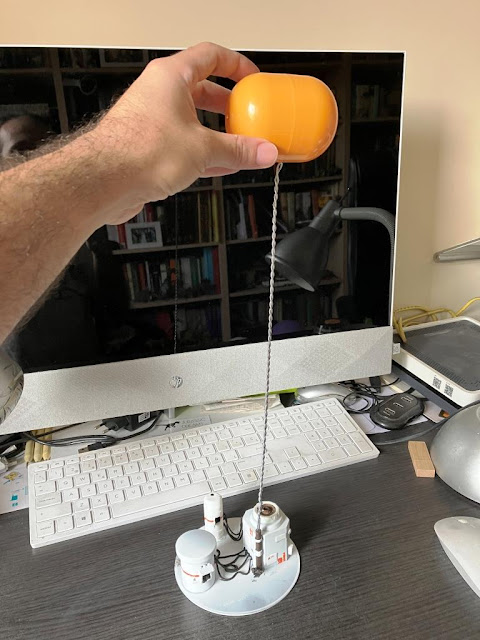
I had to make some adjustments on the go. I took the easy way and bended the wire a little. Not only it held the weight better, but it also got a more dynamic looking:
 |
Or at least that's what I'm trying to convince myself
|
I'm definitely using the large egg, as the small one, though functional, doesn't look cool enough. See:
 |
Easier, right, but that's also why I'm taking the other path!
|
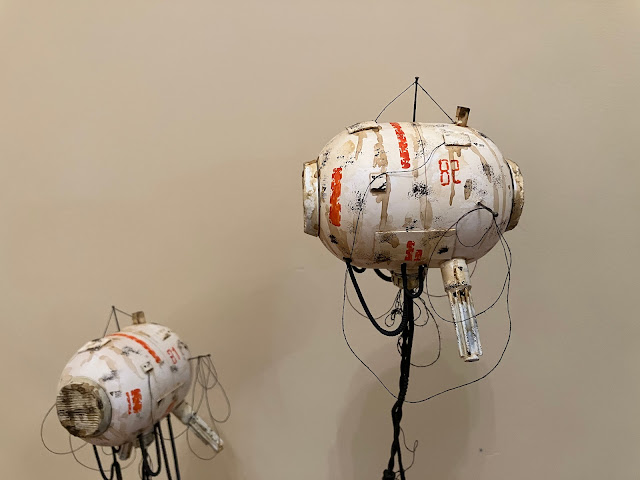
In the Dark Millenium these wires have to look dirty, worn, inefficient... I added some green stuff tubes and thread wiring all over, to get a "visual noise" vibe (not sure it that's even an expression, but it kind of represents what I mean):
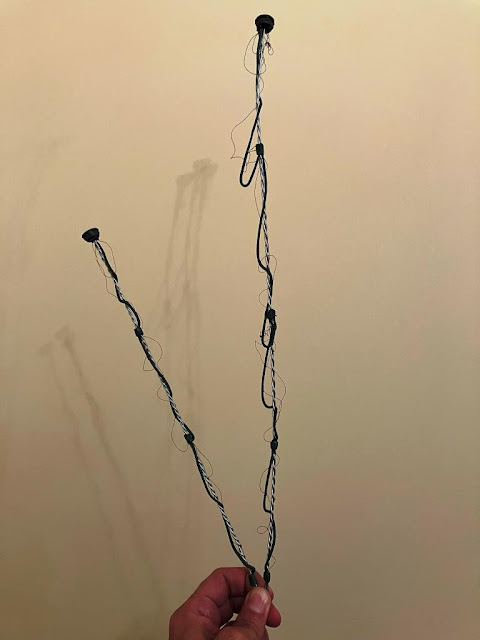 |
Took longer than expected
|
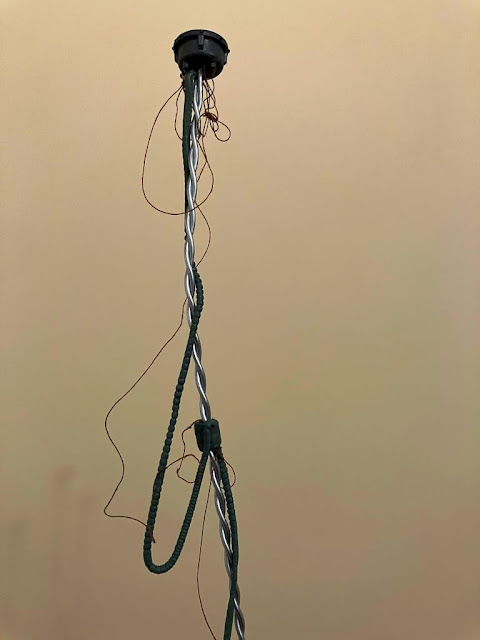 |
But I hope they'll do their part
|
 |
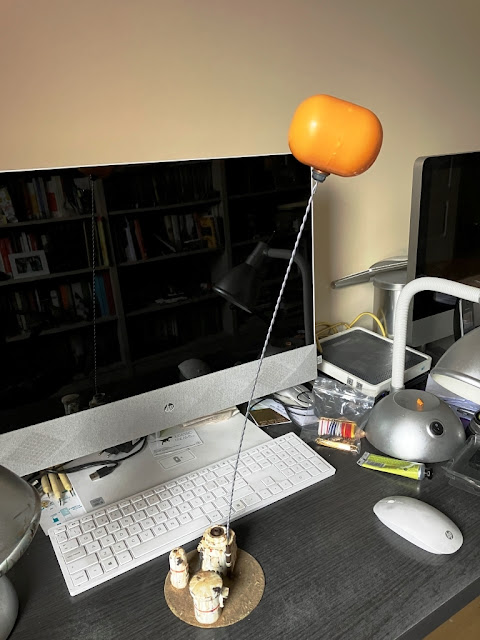
Test pic! I'm beginning to see the whole thing
|
The final stage involves the turbines themselves. I used a 1cent coin to fix the turbines to the magnets:
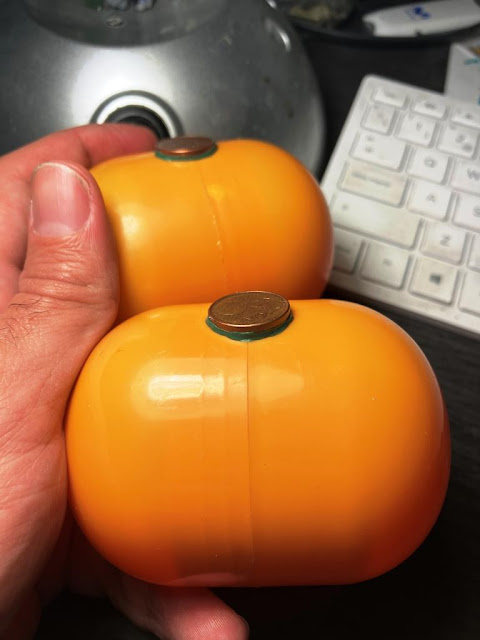 |
I'm putting my money on this project
|
Of course I wasn't making the inner structure, I simply got some 32mm bases and made grids on them with green stuff.
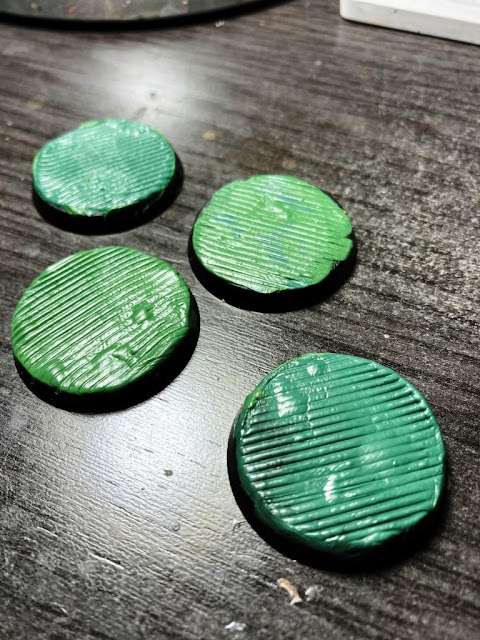 |
They'll look better from a distance
|
The rest of the bits are just card pieces, nails for the antennae, a couple of dried felt-tip pens (recently donated by the Suberlings), some more green stuff tubes...
 |
I feel it can work as an ugly drone or a weird blimp
|
 |
This is the idea
|
The painting process keeps no secret, it's just the same I did with the bases (and with any other thematic scenery I'm building!)
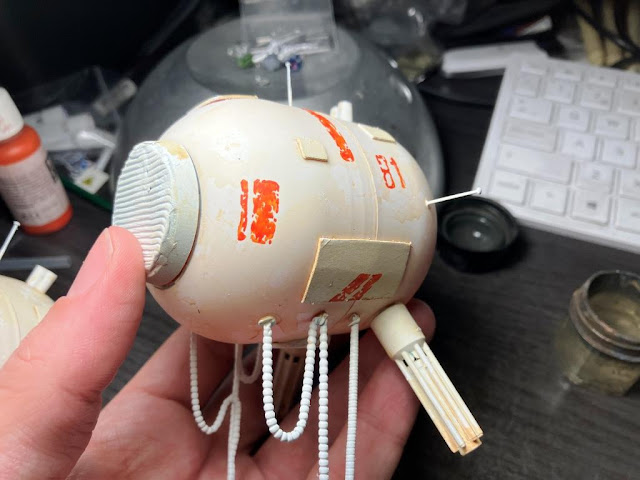 |
Not dirty enough
|
Until I got to this:
 |
Weird wind-energy electric generator blimp. Whatever
|
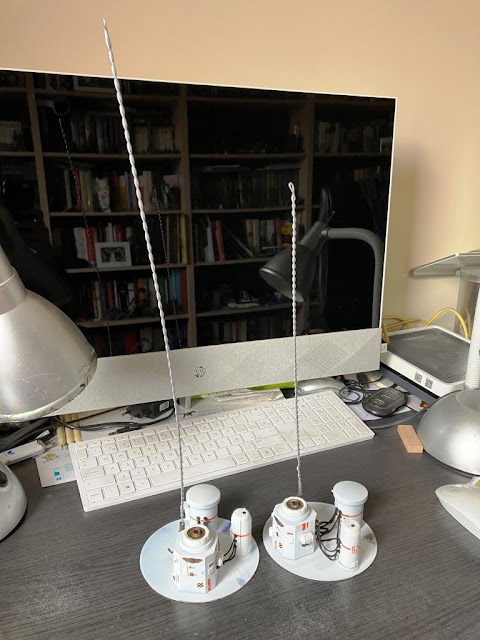
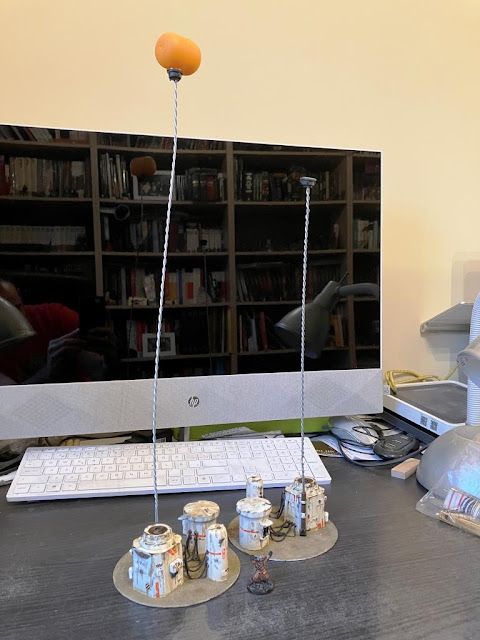
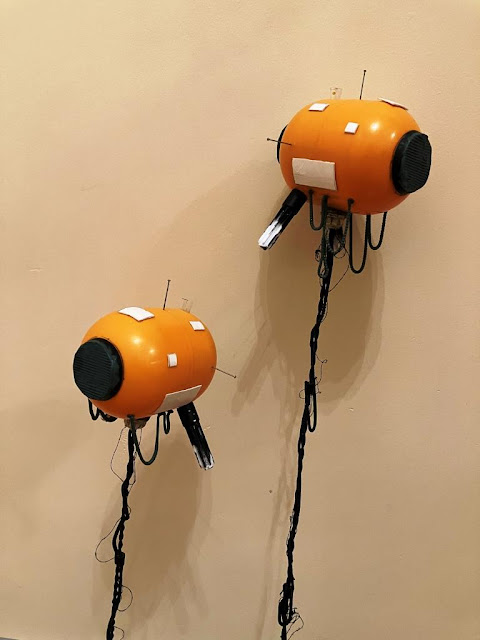
Have a glimpse of the two of them:
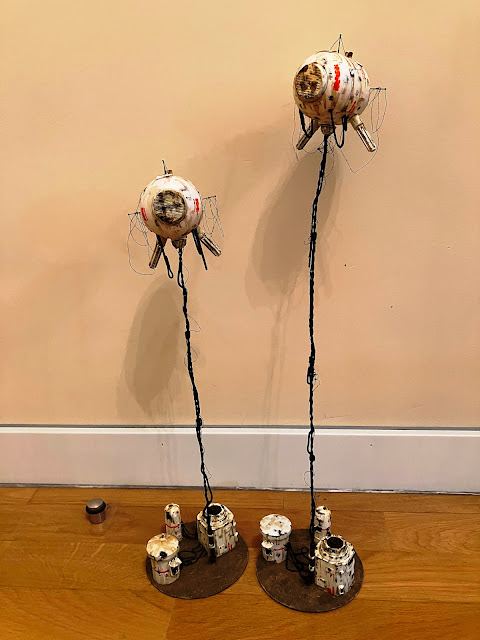 |
Finished!
|
The wires barely support the blimps, but they hold firm enough, so I'm OK with that. In fact the gentle waggling-wobbling adds a sense of realism to the floating turbines!
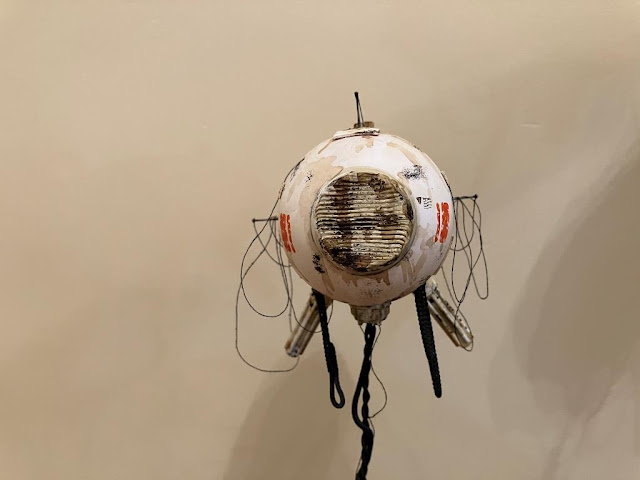 |
Front view
|
 |
You have to photoshop the backdrop and add some sky or something
|
You know me, I couldn't resist but take a couple of immersive pics. Photoshop highly needed! :D
 |
Ow. That ship's so clean it must be from an outworlder
|
 |
Much needed aerial view
|
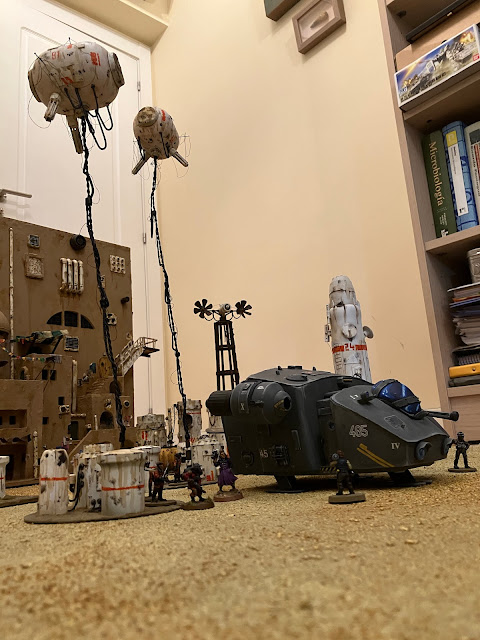 |
This is what your tiny minis see when gaming
|
Well, it's been a long, pic-heavy post, but I hope you liked the building of these two. Now that I can have a look to the whole display, I'm relieved to think I did the right thing by doing this by duplicate. Just one single turbine would have looked kind of oddly out of place, but having at least two makes the board look better, with some slight additional depth, like they are part of the ordinary sightseeings for the dwellers.
I have to confess I was keeping one of the giant eggs to stick some legs to it and build one of my infamous walkers, but I think they found a better purpose here. The settlement keeps on growing!


Oh damn, those things look badass!
ReplyDeleteThank you! Took longer than expected, but I enjoyed them :D
DeleteOutstanding!
ReplyDeleteThey look utterly brilliant!
Thank you! But it's nothing but glorified rubbish! A lot of junk in a different disposition :D
DeleteAwesome! Great imagination and modelling.
ReplyDeleteThe bases will also work just by themselves.
Thanks! The bases will be the real scenery for gaming purposes, I guess, so I didn't want to overdo them. The turbine blimps don't add that much, but I think they look cool on the board, and that's enough for me!
DeleteFrom the inspiration to the execution, these are truly AWESOME Suber, perfect call on using the larger oviods the smaller ones just didn't have the bulk needed, to convey the image, and clever use of the grills to remove the need to make the turbine inside.
ReplyDeleteThank you! Right, the experiments with the little ones didn't really work, and I think the larger ones look better indeed. I don't think I would have been able to build the inner turbine, and it would have added weight to the piece, so my priority was to keep it as light as I could. If I ever get more of these eggs I'm keeping them!
DeleteLOVE THEM! Such a cool concept and brilliantly executed. Love the coloring!
ReplyDeleteQuestion... how are you making all those hoses? I could use something like that!
DeleteThank you very much! About the question, I'm using a "roll maker" by www.greenstuffworld.com
DeleteI got it from this store, but I'm pretty sure you'll find an option from your market (I mean, no need to import it from EU). However, if you don't, just drop me a line and we'll see what we can do.
I made a step by step on its use here:
https://oldschoolworkshop.blogspot.com/2018/12/dont-feed-troll.html
I hope it's useful!
I thought you had posted one... but I couldn't find it. Thanks so much! Very helpful!
DeleteJust recently got caught up on your posts, and your terrain skills are still some of the best I've ever seen. Cool concept and great execution - and it's always exciting to see your magnificent mining town board grow!
ReplyDeleteWhen I was looking through your archive, I was wondering if the buildings you used for the Skirmish Sangin game you played last year would look any good next to the mining town? They seem of a similar aesthetic, and with the turbines, windmills, and moisture vaporators around them (plus maybe some scatter terrain like crates or generators) I think it would be suitable enough to "sci-fi" them up.
Thank you very much! Oh, you read my mind! If you look closer to that post, you'l see some "finished" buildings and some others which are merely primed. I pretend to use the latter at some point and precisely add weird sci-fi stuff and see what happens! The problem is that I start too many projects before I get to finish any!!
DeleteAnother very "anime" feel project, but I'll be damned if I can recall the exact title that's making me think this way right now! Am sure it'll come to me as I take a morning visit to the porcelain god....
ReplyDeleteRegardless, love love love these! Smashing vision and execution on these, perfect additions to your settlement for sure.
(O and "Visual Noise" is indeed a correct description - I had an artschool lecturer who'd use that term far too often back in the late 90's.)
Maybe Akira? But more the manga than the film. I'll keep thinking on it or wait until tomorrow morning ;)
DeleteThank you very much!! Oh, I'm so glad that "visual noise" makes sense, for I really cannot find a better expression!
DeleteI have a strong anime influence in my art, obviously, but I couldn't tell if I got a conscious specific reference for these (though of course there's a "feel" in them). I'm afraid I'm googling "cyberpunk blimps" and that will gave me more bad ideas!!
I had a mate back in the day who was partial to "cyberpunk blimps" (More industrial goth "blimps", but close enough!). Glad he had the stomach for them, I prefer a leaner option.
DeleteWell, I guess you can have very different takes on the basic shape of a blimp, but it goes the same for every artistic choice. I've grown sick of what we unaccurately call "grimdark" (when we just mean recent WH40K) with all its over the top gothic art and the saturation of skulls. I enjoy cleaner, simpler lines, but even there you can find so many different approaches!
DeleteI'm in absolute awe of these. Seriously, I'm almost lost for words at how incredible they are. If I didn't know you'd made them I'd think you bought them. The planning and execution is amazing and the way you've painted them is reminiscent of the covers you'd see on 70s and 80s sci-fi novels. Outstanding work, sir!
ReplyDeleteThank you so much! You know, there are some influences that stick right into your subconscious and just stay there looking for the moment to pop up. I was raised with those images around me, so I cannot avoid that style in my work :P
DeleteThank you so much! They look like "more" than they really are, but I'm happy!
ReplyDeleteI really like these, and I love your weathering and utilisation if different bits! I think two more though… :P
ReplyDeleteThank you! These were really fun to build. You can see, I just chose whatever bits I had in pairs :D
DeleteTwo more? Hmmm, wait until I restock my bits! XD
Awesome looking scrap build! Great call to do 2, I've also got 2 large plastic kinder eggs, just in case, I did wonder about using string for scale cables? I've got lot's of different thickness but I can see you've got the greenstuff down pat!
ReplyDeleteBest Iain
Thank you very much! I've seen people using strings, but I'm used to the greenstuff trick and it works for me, both in terms of thickness and flexibility. I'm sticking to what I know!
DeleteThis is great! I like the idea and seeing them come together bit by bit is really interesting. Really imaginative and inventive stuff.
ReplyDeleteThank you! They are mostly decorative, as I don't think they'll be really relevant gaming-wise. Well, unless I actually develop proper 3D scenarios! Hmmm...
DeleteThey look fantastic! Though I would knock these over all the time if they were on my table!
ReplyDeleteThank you so much! Haha, I'm terrified of that precise scenario happening to me!! :D
DeleteNo me canso de repetirme, para mí, la mejor faceta de tus proyectos, es precisamente la capacidad que tienes para sorprender y ver potencial, en cualquier cosa que cae en tus manos.
ReplyDelete¿Habría hecho yo unos aerogeneradores o unos captadores de humedad voladores…?, nunca. Si me hubiera pasado esa idea por la cabeza, la hubiese desechado por chorra, ahora sin embargo, entiendo que son absolutamente necesarios, en cualquier mesa de Sci Fi que se precie.
El día que estrenes esa mesa, por favor, cuenta conmigo. Jugar ahí, sería todo un privilegio.
Deseando ver la nueva locura que maquinas.
¡Muchas gracias! Es raro, veo piezas y de repente cobran formas extrañas en mi cabeza, no puedo evitar construirlas :D
DeleteA ver si sigo construyendo ese tablero, porque todavía me queda muuucho trabajo por delante :P