25/12/2014

Merry Christmas!

Merry Christmas you all! :D

I could not think of a better set of miniatures for today than...

...the Christmas Marines!

If you don't know what the %&#$ you are seeing, these minis were sculpted by Bob Naismith and released on Christmas '87, the very same year Warhammer 40,000 Rogue Trader saw the light. These were a Christmas gift from a friend of mine (thanks, Carlos!) and had to paint them immediately in order to have them ready for today ;)
 
Shake it shake it!

I may need to set a vignette or something, but I guess that will be for another year :D
For now I just wanted to wish you all the best, thank you again for keep on visiting and tell you I'll be back for New Year. Enjoy the holidays!

Best wishes

22/12/2014

Firefighters in!

OK, though it's almost New Year and I need a new calendar, no, definitely I'm not bringing a firefighters calendar ;)

Do you remember me playing this game?

It's been a whole year since I showed it up

You saw what was the problem then. The minis. The six firefighters were all but identical! Just in different colours! But the game uses different kind of specialists. Weird, I know. :D 
 
Old pic of a game back in the days

Fortunately the creators realized this bloody mess was unsustainable, and decided to produce a whole range of firefighters depicting the different specialists. Phew, just in time; I was getting crazy looking for 28mm. firefighters, and the choices were not that many.

Here they are:
 
Captain and Imaging Technician

Generalist and Structural Engineer

CAFS Firefighter and Rescue Specialist

Rescue Dog, HAZMAT Technician and Paramedic

Driver/Operator and Veteran

But well, of course you can still play the original minis if you please. As you can see I used the floor to make them recognizable by colours:
 
What was I supposed to do? Leave them unpainted?

When the whole company is together they really look like a team!!
 
I'm almost expecting a TV series out of these!
 
Now I do believe these guys need a baptism of fire (of fire, you get it? I'm so witty...)

I foresee some really busy Christmas...

18/12/2014

Interlude. Starsky & Hutch!

OK, retro-power today! Oldschool by the book ;)

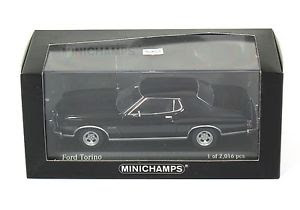
My mate got this 1/43 Ford Gran Torino...
 
Well, not exactly this one. I stole the pic from the internet

 ...and challenged me to give him back the Starsky & Hutch car:
 

 Well, at the moment of writing this I'm googling pics of the car and only now I'm realizing the same company also produces the very same car with the exact colours. Oh, my. The product already existed. And I've gone the whole process all along. OK, that's right. I'll tell you what. Instead of typing the first words that are coming to mind (which may in fact not be suitable for all audiences), I'm just letting myself relax and tell you all about these few hours I've put into this project.

I tried to remove all the pieces, but almost cracked the windscreen, so I gave up. I could took both side mirrors and windows apart, but that was all. I covered glasses and delicate pieces with masking tape and then primed. As the car was going to be red, I chose white priming.
 
I brushed the area of the stripe in white so it looked properly opaque
 
Then it's all about having steady hand and drawing the pattern with a pencil. No coffee abuse is allowed three hours prior to this stage :D
 
Then to the brushes!
 
Painting big flat surfaces is always tricky. You have to thin the paint to the extreme, use long, delicate brushstrokes and have patience to apply layer after layer.
 
Then another layer. Yet another one

I know where this is going. Look at the calendar...

It's actually Santa's car!

I had some doubts about the varnish. I needed a gloss look and I thought of a spray, but I was strongly recommended otherwise, due to the possibility of bubbles appearing or the varnish getting coarse or whitening when dry. I went to old reliable Vallejo brush varnish. But whoa! Another hell of a work. Once again you have to thin the varnish and take care of the brushstrokes. I was on the edge of ruining the whole work a couple of times!
 
Shiny!
 
So this is it, Zebra Three ready to patrol all along Bay City!

I'm confused. It says 'Ford Torino. Black', but now should say 'Striped Tomato'

I think this has been the oldschoolest project I've faced so far ;). Far from perfect, of course, cannot be compared to the official (already existing) car, but I'm satisfied so far.

Now for new projects!

15/12/2014

Painting Descent. More big baddies

As promised, here I bring the remaining creatures :)

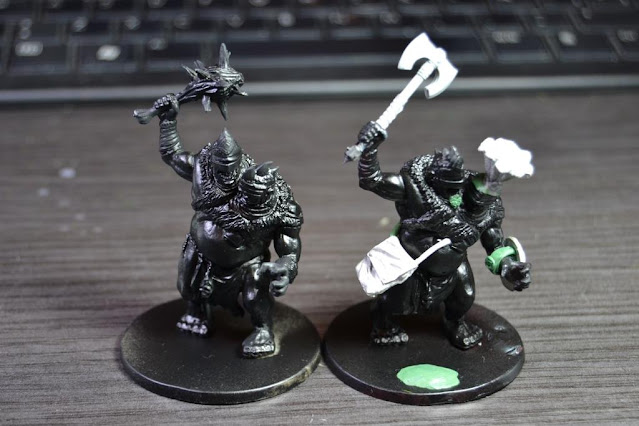
The Ettin is quite likely my favourite mini from the whole lot. A menacing two-headed ogre that looks absolutely cool. What could I do to make a difference between the regular Ettin and the boss? I thought of armour pieces, but I wasn't quite confident on my own skills to sculpt a complete armour out of greenstuff and make it look good. Anyway, I found useful bits that helped me on my task:
 
Subtle, but it works for me

Couldn't find a shield of his size, but the small buckler might look funny.
 
Shake that belly! C'mon, bow chika wow wow!
 
Their family meetings must be clangorous

The final beast is the Dragon. I couldn't find a way of making them appear different in shape, so I just painted them differently. Maybe too classic, but I was playing safe here.
 
Tiny tots of Smaug

So the whole lot of creatures looks like this:
 
Welcome to the jungle dungeon

 
You know, the game scenarios have some special characters not included in the core box. Of course you can buy them, but both my mate and I find them expensive, so we might be looking for homemade alternate models ;). Not on a rush, but if I find suitable options, might be able to complete the set. All in time...

So now all that we have to do is just play the game! I'll let you know as soon as it happens!

11/12/2014

Painting Descent. Big baddies

There are some pretty nice interesting creatures in this game, as I have previously said. The small guys were nice, but I think the big ones are even better.

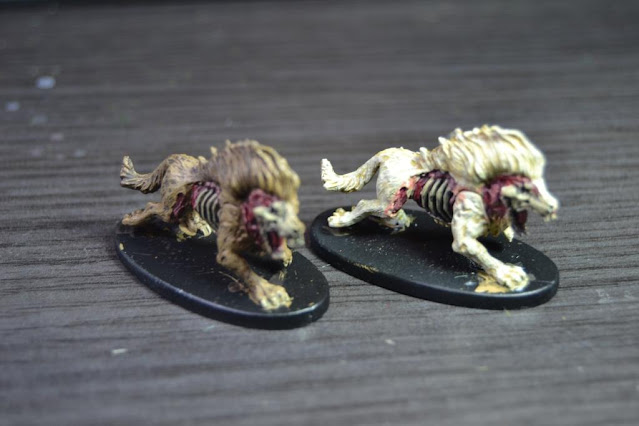
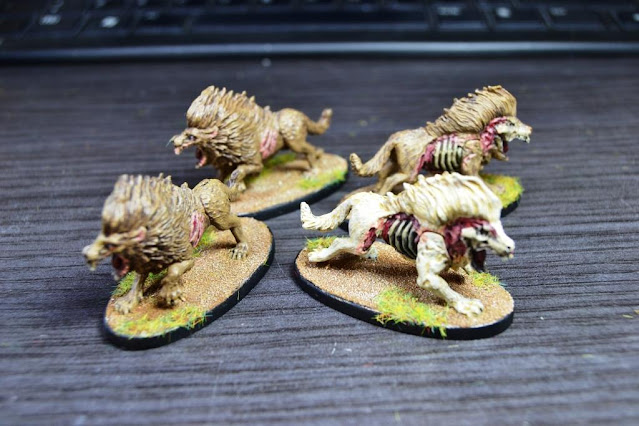
For the Barghest pack leader, I didn't make any conversion. I thought that an albino zombie wolf would be suffciently representative :D
 
Tried brown on the others rather than black, I'm trying to make the difference! :D

If you ever see this, you better run!
 
I find the Merriod quite a disturbing creature, and that makes it great. An evolution of the D&D Bulette, I guess. I used greys for the ordinary one, but I didn't want to repeat the albino theme again to make a difference for the leader. Yeah, it would have made sense, the white shark and all that, but I tried just the opposite, I went to a darker palette:
 
'Jaws' OST sounding now
 
The Elementals are interesting creatures too. I was used to see Earth Elementals, Water Elementals, etc., but this one is a mega-combo Elemental! All four elements combined. The mini is built in a way that doesn't allow almost any conversions, so I had to improvise. I added a couple of extra air swirls to the tail and sculpted some kind of rough face, nothing bur a couple of eyes in the rock, trying to keep the feral aspect of a beast.
 
Besides, I had this little stone from a local park :)

I toyed with the idea of a horned beast, something like a Balrog, but on a second thought, it wouldn't fit the idea of an Elemental, I believe. Or at least may be out of place with this mini.
 
I'm hungryyyy

I'm still finishing the other two type of creatures I have left, I'm quite confident they will be over here after the weekend ;)

08/12/2014

Painting Descent. Small baddies

Back to Descent again :)

The creatures in the game are pretty nice, you have a proper variety of bad guys to make the adventurers things difficult. For gaming purposes, each type of creature has two profiles: the 'regular' baddie and the 'leader' of the pack (a tougher kind of creature). That is represented into the minis by having them sculpted in white or red plastic, but there is no difference in the sculpt itself. So, once you paint them, you have to be sure you make a difference!

For example, for the Spiders there was no issue, I think it's quite easy to make the leader look different:
 
Attercop! Lazy Lob!

Crazy Cob! Old Tomnoddy!
 
And so it was for the Goblins, as I didn't think I was able to achieve anything decent or 'believable' by swapping heads or anything like that.
 
Only minor changes with greenstuff to represent he has kneepads and is better equipped
 
Though subtle, I think it works

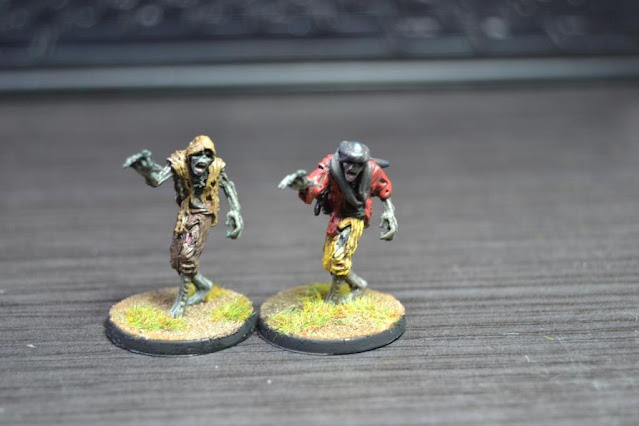
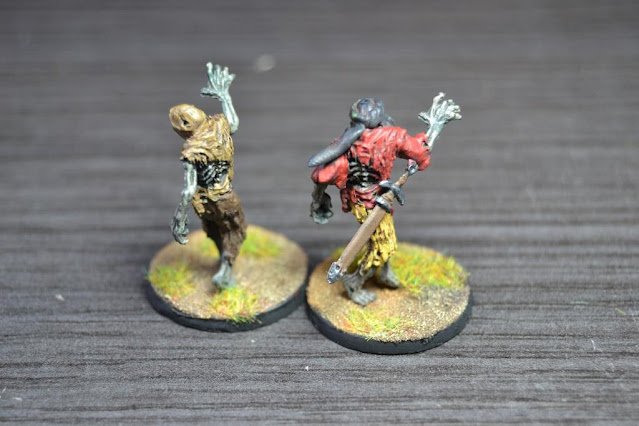
However, I thought I could do something else for the zombies. Any human-sized mini allows me more freedom. I thought it might be cool if I added some more detail to the boss. My first attempt was to sculpt some kind of crown, depicting some king of old, but I wasn't able to sculpt that on the hoodie; nothing looked fine enough for me. I finally tried a different approach, by sculpting a kind of turban and long sleeves:

Looking for a Berber-ish style
 
 So the difference is not that obvious, but enough to make the mini look different:
 
Zombies playing 'it' ('Cops and robbers' is it called too? I believe there are some variants of this)

Now they're dancing 'Thriller'

'Cause this is thrilleeeeer...

...Thrilleeeeer...
 
I had some problems with the Flesh Moulders. The concept for the creature is great, but the mini is kinda complicated. The pose, the flow of magic over the head, the blowing robes...
 
This is what I could make with this
 
Not quite convinced about the conversion, but if I was to try anything more complicated, I would have been forced to disassemble the whole mini and make a completely different creature. I think this was enough to make it look different.
 
You see? We are different
 
Different, I say!

Well, this is it so far! I'm currently working on the big tough baddies, I believe I'll be showing some of them later on this week. Hope you like them!

03/12/2014

Besenval Port. Stage 2. First board finished

My wannabe architect career goes on... :D When I posted the first steps of the project you already saw what was I trying to achieve. Now it was time for some paint...
 
Neighbours and people in the street wondered what the hell I was doing

 
Needless to say, I lacked the guts to brushpaint this. I made some experiments and finally found a spray that dissolves the foam only to a quite reasonable point. So I could make some progress without absolutely destroying all I had achieved so far. Weathering had to be done with brush, I'm afraid, but after a few days I got something:
 
Blue primer spray too ;)
 
Once I had that I could start to think about the second level. Back again to the beginning, I had to repeat the process:
 
Besides, I had to add stairs. Another pain in the ass

For the other lot I dared to something slightly more complex, in order to avoid repetition in stairs; I tried to set them parallel instead of perpendicular.
It looked like a nice idea then. 'I can do this' 'Piece of cake' 'Blah blah blah'

I will spare you the insults and blasphemies involved in the process until I got something

 
After a few days of carving I finally was able to come up with this:
 
And you still wonder what the hell you are seeing here


Again, more painting, weathering and then finally sticking all the pieces together!
 
What do you mean by this being only the first one? Are there to be more?


Here you have a lousy blurry pic for size reference:
Damn, didn't realize it was that blurry
 
Well, so this is the first 120x60cm. board (roughy 4x2 ft.). Now I will put all my effort on the Descent project, but as soon as I finish it I'll be back on planning the next section of the board. So... more to come!