As I told you, I finally had the opportunity to play the game!
The core rules are quite easy to learn, so you can handle them in a few minutes. There are two ways for playing it: confronting two more or less equal forces in any generic battle or following historical scenarios provided with the game. We did this way and we had a couple of games: We fought both for Pegasus Bridge and Omaha Beach. We thought they were pretty iconic battles suitable for our purpose.
Let's go for them:
PEGASUS BRIDGE
The game intro says it better than anything I could write, so I'll just copy it:
The late hours of June 5, 1944... Led by Major John Howard, the men of Oxford and Buckinghamshire Light Infantry step aboard six Horsa gliders on a secret airfield in Dorset. Their mission: to launch the first airborne assault of D-Day and capture two bridges, one astride the Caen Canal, the other over the Orne river, in Normandy.
A few minutes past midnight, now June 6, 1944, the gliders clip through the treetops and land in a small patch of rough field, between a pond and the Caen Canal, only yards away from their objective! Major Howard and his troops pour out of the planes, achieving complete surprise and rushing the stunned German forces. Despite furious opposition from a heavily sandbagged machine gun nest at the end of now famous "Pegasus" bridge, they capture their objective within moments. To the east, the Orne bridge is secured equally rapidly, giving British troops the first victory of D-Day!
The stage is set, the battle lines are drawn, and you are in command. The rest is history.
The core box only provides you regular American and German forces, so I'm afraid the Brits must be impersonated by American minis for this battle. Sorry, chaps.
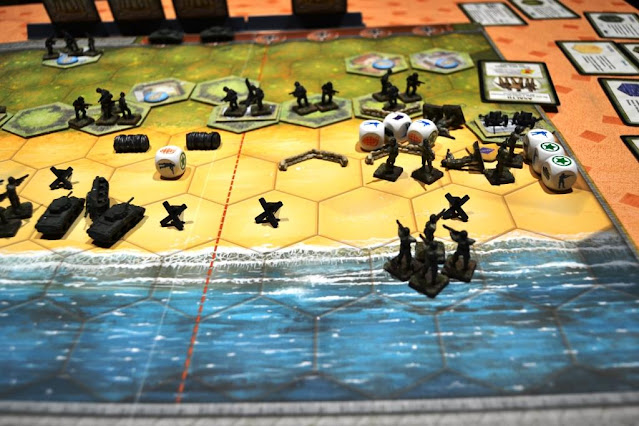
The board with both forces deployed looks this way:
 |
| Defender's point of view |
On the left you can see river Orne. There's a pond in the center (depicted by those four river sections) and the Caen Canal with Pegasus Bridge is on the right of the photo. So you can see the game is set on hexagonal basis for movement and shooting. The boardgame is divided into three sections (those red lines). Actions will be conducted either on the center or on any of the flanks.
Each player is provided with a number of Command Cards. Each card contains a different action you can use on one (or more) units on one (or more) sections of the battlefield. So one player uses a Card and moves/shoots/whatever the units allowed by it, then the other player does the same by playing his own card. At the end of each turn, each player draws another card from the deck.
For this scenario, British had six Cards and German only four (that shows how they were taken by surprise, so their tactical options are more limited).
Enough rules! Let's go for some action!
The first turn is for the Brits. The Command Card allowed 1 action for 1 unit in the central section.
 |
| British troops in American disguise advance towards enemy positions |
Each unit can move tho hexes or move one hex and shoot (if there is any enemy within 3 hexes range). The closer the target, the better chances to hit it. We'll go into shooting right now. Brits didn't shoot any enemy unit, but Germans now were aware of danger!
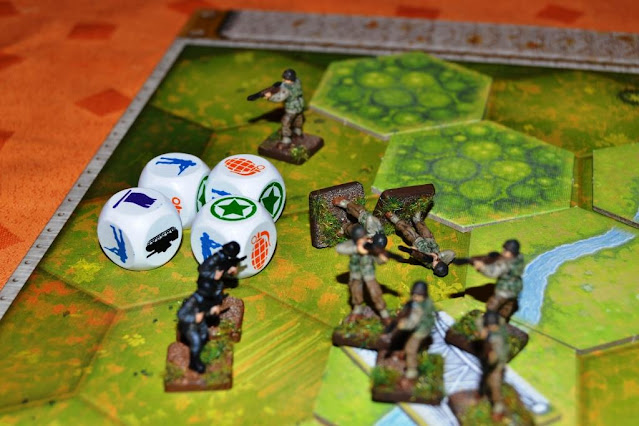
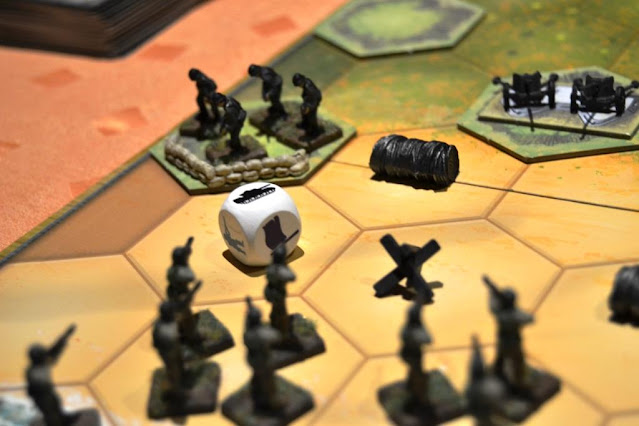
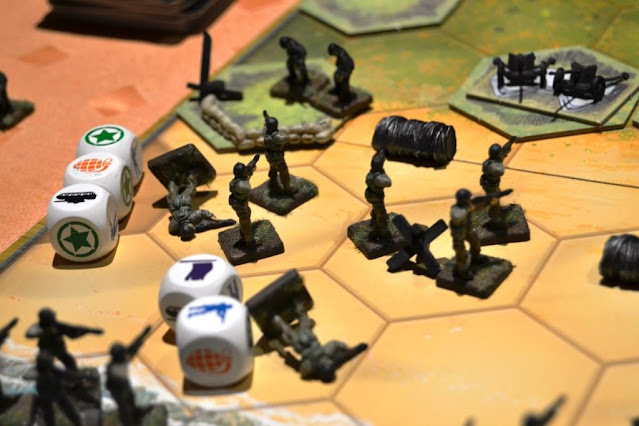
Germans got a 'Barrage' Card. That means that you can choose any unit all over the battlefield and shoot directly on its position. This is made rolling dice:
 |
| Not just regular D6 dice! |
Each symbol means different things: Infantry symbol makes one hit on infantry units, but has no effect on tanks or artillery. The Tank symbol hits tanks, but not Infantry. The Grenade hits anything. The Flag makes the unit fall back one hex. Finally, the Star is just a miss and causes no effect.
 |
| This unit got two casualties. Aaargh! |
Wiping units out and conquering determined enclaves (Bridges in this case, of course) gives you victory points. In order to win this scenario, you have to get 4 victory points. The assailants were determined to do so, and caused two casualties to a German unit. Defenders made some movements on their right flank.
 |
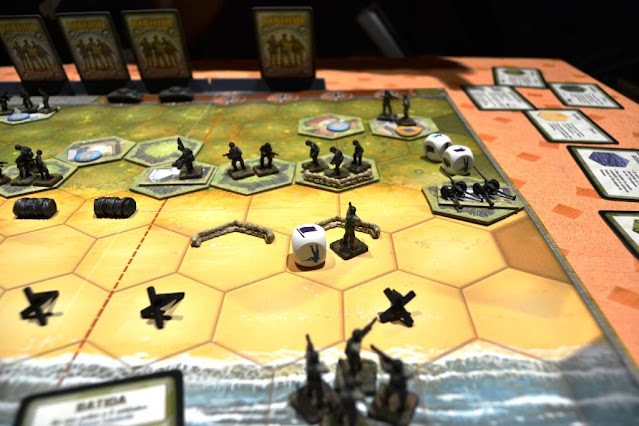
| Hold on, men! |
On the other side of the board, Brits took over the bridge on the Orne, earning their first victory point:
 |
| River Kwai? No, sir, I am afraid you might be slightly misguided |
And kept on pushing hard on Pegasus Bridge:
 |
With amazingly lucky dice rolls
|
 |
| On and on |
 |
| What's this? Watch your rearguard! |
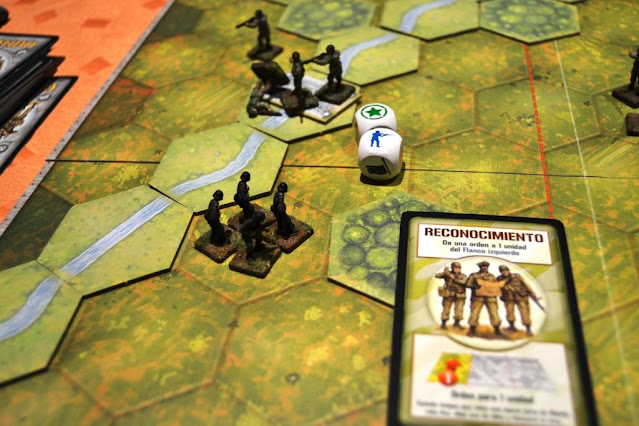
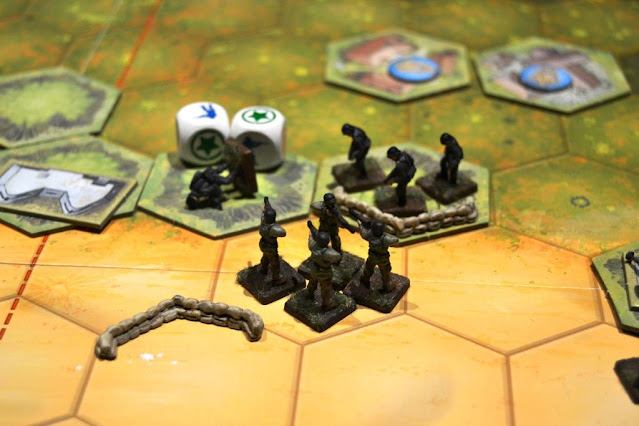
After some turns of both-killing, Brits got a decisive Command Card, 'Pincer Move', allowing them to give orders to two units on each flank:
 |
| You have to take my word, the card says 'pincer move' in Spanish |
They took serious advantage, gaining control on this area:
 |
| Another victory point |
And this other one:
 |
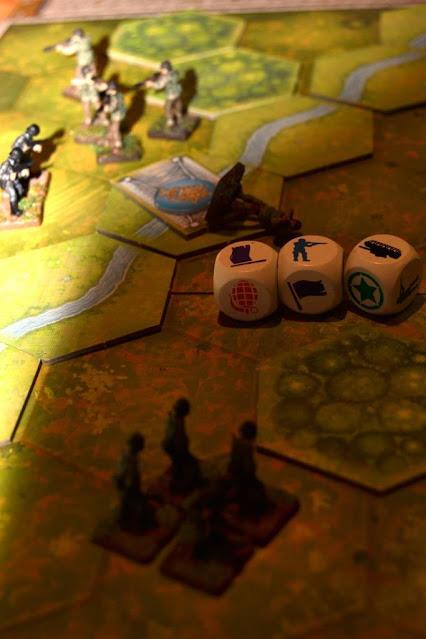
| Two stars and a tank? All these guys and no one hit anybody? Seriously? |
Germans got an important Card too, 'their finest hour': You roll a die for each Command Card you have. Each unit symbol allows you to give a unit of that kind receive an order, and stars allow you to choose any unit. Those units receiving orders can roll an additional die.
 |
| Two Infantry symbols and a Star. So Germans could use three units at the time |
They tried to balance things, both on river Orne:
 |
| Keep shooting! Keep shooting! |
And the Pegasus Bridge area:
 |
| Protect the bridgeee! |
But British troops reacted quickly and definitely took over their right flank and the bridge on the Orne:
 |
| Clear! |
Pegasus Bridge was still at stake:
 |
| Bird's eye view. Brits 3 points, Germans 1 point at the moment |
Germans made a last attempt to regain the Bridge on the Orne:
 |
| Not bad, but not enough |
But British Airborne troops finally conquered the Bénouville Bridge, which would be later known to everyone as Pegasus Bridge:
 |
| Because, you know, their shoulder badge was a Pegasus |
So that's the game. Roughly half an hour. Easy rules and quick playing, so really enjoyable. As we were having fun, we decided to make things a little more complex and play a different and more complex battle. We took it to a different level and we decided to fight for...
OMAHA BEACH
Now that we know the rules, I'll try to go a little swifter than the previous game. Let's go!
 |
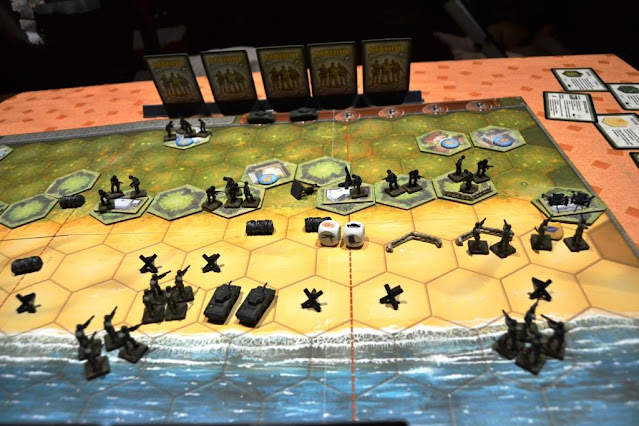
| It's just the same board on the other side |
We had a different game dynamic this time, as a new friend came to play. So one player would take control of German forces and Americans would be played by two people. The game foresees this kind of issues and gives you some rules: one of the players would act as the General (giving strategic orders) and the other as his Lieutenant, keeping tactical control on the decisions made by the boss. What does that mean? The General uses the Command Cards at his discretion, keeping absolute control of the central area. But both flanks are under subordinate control: he can give an order (as depicted in the Command Card for units in one flank), but the lieutenant decides how to take that order into effect, i.e., the lieutenant really decides who (and how) will act in each case, trying to best fulfil the orders received. So the operational strategy can be challenged when we go down to the tactical level. The mayhem of war!
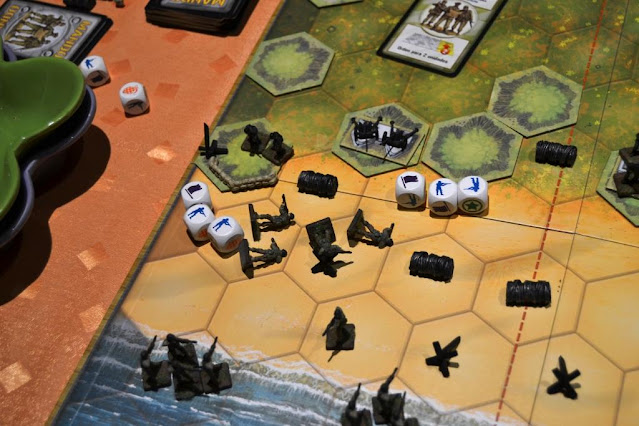
Americans have four Command Cards and Germans five, and they also have the first turn. So German forces begun to defend their strongholds:
 |
| Artillery shoots from the bunker on the hill |
 |
| Tired after running across the beach, Americans fail their roll |
 |
| German artillery has some really devastating effects |
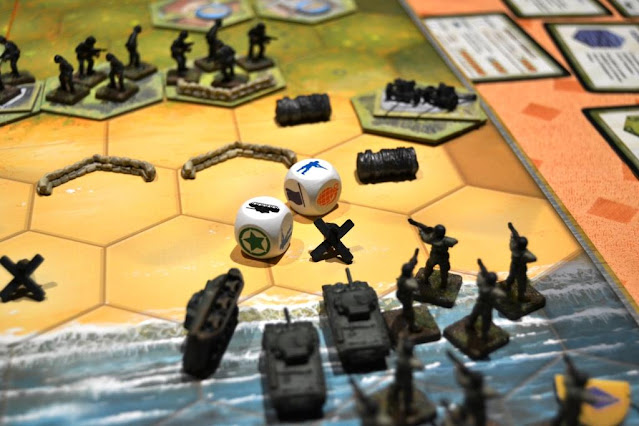
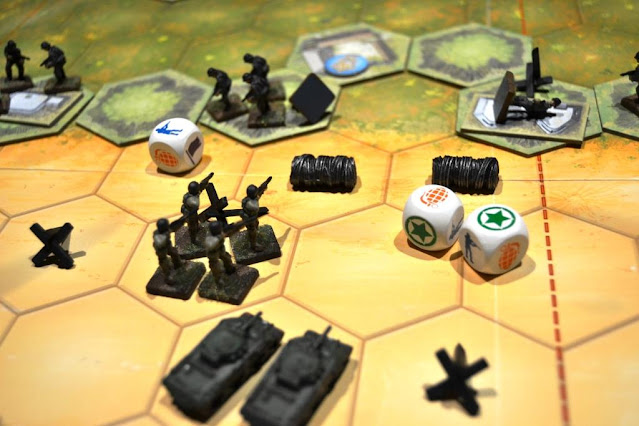
Americans got a lucky card, specially suitable for this scenario, 'General advance': two units in every section can receive orders:
 |
| Advaaaaanceee!!! |
 |
| Tanks hit this unit, causing one casualty and making them fall back |
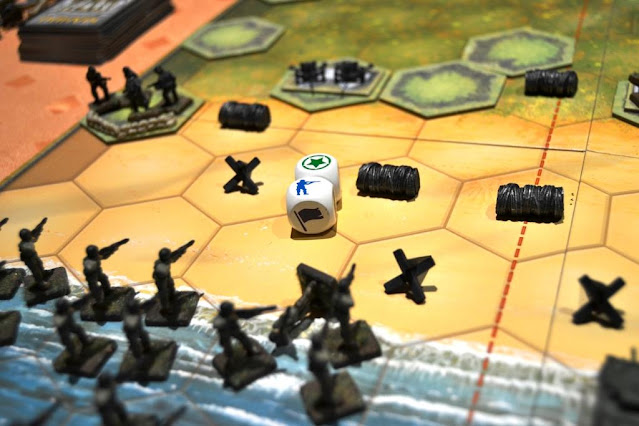
If a unit must fall back due to a Flag result in a die roll, but can't go anywhere (hexes have other units or it's the end of the board), it's considered destroyed. If the unit is on the first row of hexes of the beach, they can't fall back to the boats, but the unit is not entirely destroyed. In that case, flags count as casualties. So the first tiles on the beach are particularly dangerous for the Americans! You have to get out of there!
 |
| You can't go back to the sea! |
 |
| However, Americans kept on putting pressure on the defenders |
At this moment, the battle was really bloody and hard. The operation was entirely endangered, as German positions were totally unassailable.
 |
| Another flag, one tank down. |
 |
| Take down that artillery post! It's decimating the tanks! |
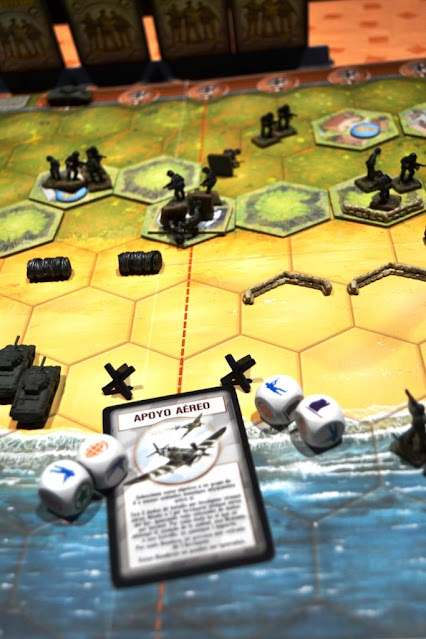
Allies recalled 'Air Power': Choose adjacent units and roll two dices for each one. The unit symbol, grenades or even stars make a hit. Flags make the unit retreat, even if it was entrenched.
 |
| One unit received two casualties, the other one casualty and falls back |
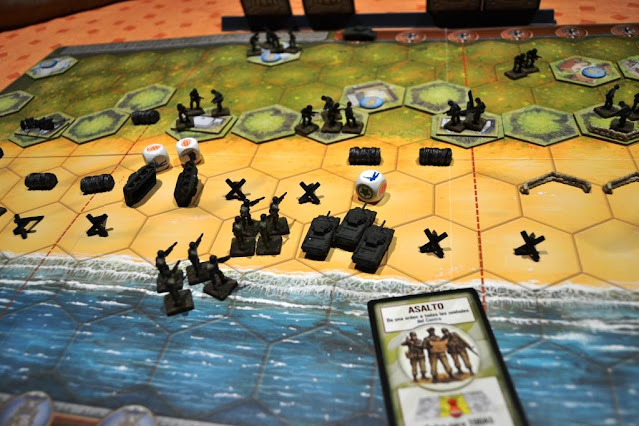 |
| Americans gained some terrain, but the price was high |
This was the general aspect of the battle at the moment, still far form finished: you need six victory points to win the game!
 |
| You are seeing our strategic options! |
 |
| This was quickly becoming a true slaughter |
 |
| Allied Cards allowed little freedom of action, but there was no surrender |
Germans got an 'Attack' Card. Devastating results again:
 |
| Truly the longest day for these guys |
Americans used the 'Behind Enemy Lines' Card. Rangers managed to infiltrate behind German positions and got control over the little village on the far end of the board. However, my rival didn't hesitate to use his artillery to barrage them, even being in the village. Shame on you! Booo!
 |
| I've been on that beach and I got the impression that artillery didn't have such a 360º capacity |
 |
| Pushing all over the central sector |
 |
| The most successful roll of the game. The poor Ranger guy had not a chance |
 |
| Whatever you do, remember: you have to save Private Ryan! |
 |
| With this the game is mostly decided |
 |
| A final action, but... |
 |
| ...Germans used artillery. It's super effective! |
That made Germans get their sixth victory point.
 |
| Six units destroyed. Axis victory and history twist |
The Atlantikwall seems to resist!
This game was significantly longer, about more than an hour or so. But it's still quite a reasonable time to spend on a battle this size. I have really enjoyed the game. Simple, but not glib, and with enough depth to make it interesting. Both scenarios are quite historically accurate and they are really atmospherical in their conditions. Curiously, the game still seems kind of abstract to me, I mean, I guess you could change ambientation and make this work in a sci-fi, modern war or medieval setting with slight modifications.
This was my gaming experience of the week, next day some painting again! Hope you enjoyed!

Alucino. Es que lo de pintar los juegos de mesa me parece lo más!
ReplyDelete¡Jaja, también son minis, tienen su corazoncito! ¡Tienen derecho a ser pintadas como sus primos grandes!
ReplyDeleteA DIFFUSER PARTOUT – TO PUBLISH EVERYWERE
ReplyDeletePlease, if you do not understand french, come to us , we shall help you.
Pegasus Bridge – YouTube
Françoise Gondrée fondatrice du Musée de Pegasus Bridge.
http://www.youtube.com/watch?v=HqaYPBJ0Z34
Le Musée de Pegasus Bridge
vous remercie de l’intérêt que vous portez à son Musée de Pegasus Bridge qui doit sa notoriété aux acteurs du 6 Juin qui l’ont créé à titre de reconnaissance insigne avec Françoise Gondrée en 1969 , fondatrice, le Haut Patronage, une équipe de bénévoles pendant tant d’années et qui est toujours en activité .
Si les donataires avaient jugé utile de donner leurs collections au Comité du Débarquement, ils l’auraient fait. Ils avaient leur raison !
Ils doivent reposer en Paix et par respect pour eux en attendant le dénouement des procédures au Pénal engagées contre l’amiral Brac de La Perrière , Pdt du Comité du Débarquement
Il faut dénoncer le scandale !
Le Musée de Pegasus Bridge dit ‘Mémorial’- ou “Musée”par l’amiral Brac de la Perrière pour tromper le public- il s’agit bien de notre Musée – dont le siège est au Musée sur la commune de Ranville – que l’amiral Brac de la Perrière nous a usurpé avec toutes les collections, occupe, encaisse les entrées à notre détriment , en fait une foire à tout ……….…avec la connivence des institutions locales depuis plus de 10 ans.
Il faut dénoncer le scandale !
Si le Musée de Pegasus Bridge, propriétaire de toutes ses pièces, l’amiral Brac de la Perrière n’a strictement rien pour se justifier, d’où son emploi de coups bas…… , impostures…(aff. Independent, Berridge…), complète désinformation historique….. ,…………… en fait une foire à tout………
Notre combat depuis plus de 10 ans en procédures au pénal sont toujours en cours car le Musée de Pegasus Bridge ne cédera pas aux dénis de Justice , outrage aux victimes pour plaire aux marchands de complexes militaro-politico-touristiques sans Histoire et sans mémoire .
La démocratie doit être respectée et le patrimoine rendu !
Demain sera t il votre tour d être dépossédé ?……………..
Les élus, chacun et organismes, au courant , qui n’oseraient pas le dénoncer, confirmeront leur connivence avec les conséquences que cela pourra entrainer
Voir ”Conflit” dans le Menu de notre site https://www.pegasusbridge.fr
Rejoignez la liste des supporters en nous adressant un courriel/mail :museedepegasusbridge@wanadoo.fr
en créant un lien à votre site ou blog, en diffusant partout la vérité.
Françoise Gondrée , Présidente
Fondatrice du Musée de Pegasus Bridge
Pierre de Roquefeuil, Vice-Président
Conseil d’Administration
museedepegasusbridge@wanadoo.fr
https://www.pegasusbridge.fr
Thank you for your interest in this humble blog about gaming. Though my French is terribly poor, I believe I understand your message. I'll check your links :)
DeleteCheers