30/07/2023

Boarding a new project

 New crazy project starting now!

I have to admit that I've been working on this for some time, and my original plan was to have the whole project finished before I posted it all, but in the end I've decided to show the first part of it.

If you look back in the archives of this blog (or you've been over here long enough and have a real good memory), you'll see that back in the day I built a full 3D board for Shadespire, as I don't really enjoy playing on cardboard if I can avoid it.

I keep on talking about Shadespire and not Underworlds, because in fact I've never got the other games. That's why I took my chances and went 3D on it. Of course I wouldn't be able to storage full 3D boards for all Underworld Seasons, so I focused only on one. Given my number of games per year, it looks reasonable.

The thing is that, speaking of storage, my boards posed quite a problem. I simply couldn't make them fit in any shelf, wardrobe or whatever. So I had to make a difficult decision... and let them go.

I didn't have to put an Elsa costume on or sing let it go or anything, so it was easier than you think. I made a donation to a local club and moved on.

But moving on means... that I need a new version of the boards, but this time making them stackable! Right, of course it's the only reasonable thing I could do, why do you ask?

I need them to be fairly threedimensional, yet flat enough to allow storage. So with this conundrum I started my Shadespire.V2...

Here I go, again on my own...

The first setback I had to face is that the company that produced the boards I used the first time had unfortunately ran out of business. After some research, I concluded that my only choice was a shop called Customeeple, that produced hexed boards fit for the game. The only issue is that... they don't provide a single MDF piece, but two halves!! Right. Go see the pic above again and you'll get what I'm saying.

OK, some extra work, but still doable. I glued a reinforcement below and those hexes on top. Now I have a solid structure. Now let's think of the 3D aspect of it.

...going down the only road I've ever known...

That's the top height I was comfortable to afford. I provided five support points with the same height. So anything I stack over this board will keep horizontal. I checked several times, trust me :D

Well, let's add some salty details. As in my previous iteration, I'm marking the starting positions on the board with crystals; or more properly speaking, Wyrdstone. What can I say, I'm still oldschool. I added some skulls and rocks too, for some warhammerical ambientation.

No element can get higher than the five designated support points

Time for texture. Just DAS putty:

No need to cover everything, you just need to give an impression of an irregular field

Then I added sand, fine gravel and stuff

The same, but in the sunlight

The areas without sand will be some puddles, as this board will look like some puny marshes or something. Now it was time for some colour. I have only one trick here: throw all you have on the board!

You can't have enough tones of brown. Mix and try everything

After proper drybrushing to provide some homogeneisation, I painted the puddles. I had some doubts here. I should have painted them brownish, but then there wouldn't be any kind of visual contrast and it all would be too dull. So I sacrificed realism for conventionalism, and settled for blues.

Dirty blues, with a lot of greens and browns

OK. But for now the board looks like a weird desert. All that water calls for at least some grass...

So some grass it is!

With some true natural daylight

The same, but inside, so you can compare

I also added some bushes here and there

You may have been asking what are those three weird sticks on a row supposed to represent. Well, my intention was to have an old fence all shattered. All these pieces come from a Renedra kit.

I hope they finally make sense!

Let's have a look at the whole board:

Finally coming along

I mean, I could totally play here

I would ordinarily declare this board finished. But not today. I have a confession to make. I had been collecting falling leaves during all the Autumn, and using this puncher by Green Stuff World:

It can get repetitive, but the results are worth of it

The good thing of going out with the kids is that no one will judge you if they see you collecting hundreds and hundreds of leaves. I guess that seeing a bearded adult doing the same might look a little more weird. But I have also done it though.

I mean, I need a lot of leaves.

I know what you did last Autumn

I'm not showing the final bag I ended up with because it's ridiculously big even for me XD

Now it comes the time to apply the leaves on the board!

One by one, with a tiny drop of superglue

I even wanted to add more, but I had no sanity points left for it

You may probably come with an easier solution, but in the end this method worked for me, as it gave me full control of what I was doing and had no leaves unglued whatsoever.

Just a close-up

And again, an outdoors shot of the board, now definitely finished

This is what playing on it will look like

Final shot

I'm trying to find a balance between an hexed board (where you can actually see the hexes and have no misleadings about the tile your mini is on) and a natural, visually appealing display. I'm learning a lot and will definitely bring some of these techniques to future boards.

But for now what can I say? One done, three more to go! I don't know when will I start the second one, but I think I have some ideas of what I want to do...

13/07/2023

It's been an infinity since last time I posted...

 ...but it's because it took me all this time to think of a title for the post.

After my first incursion into these ranges, it was time for the Yu Jing set! Well, first thing I have to say is that they are, of course, as detailed as their Panoceania counterparts, and that's wild. I mean, they all are gorgeous sculpts, but they are pretty challenging because of that!

This time I found the main base colour at the first try, which makes me utterly happy :D

It's a particular orange. I used a 50/50 mix of Vallejo... "Transparent Orange"? (a pretty neutral orange) and Deep Yellow:

So now it's really a kind of yellow

And then I used GW's Iyanden Yellow Contrast as a wash, as I've done some times before. This provides a kind of orange I' happy with:

I can work with this

So, you know, as usual in my techniques, the key is to use the paints to any other purpose different than they were designed for. Do it wrong to make it right!

Anyway, I painted all the oranges on a row:

At this stage the main precaution is not to lose any bit

You may notice there's an intruder there, the girl with the rocket launcher down in the pic. It's Oktavia Grímsdóttir, a special character who doesn't really belong to this faction. However, I had to paint her jacket in this colour, so I just got her there. I'll have that mini finished for the next installment of the project.

Now I had to paint different kinds of not-really-black clothes. For the trousers I used a mix of dark green- dark blue- black mix (highlights from there with more blue). For the cloaks I went for a more neutral grey (black and grey) and the armour pieces were made with a mix of German Camo green and Black. Finally, weapons were made with a Royal blue and Black mix, adding grey to the mix for the highlights.

You haven't read the above paragraph and I'm OK with it

I dared to use the Apothecary White Contrast paint, and I was surprised with the result:

Unexpected success

In the end this is what I got. Here you have the armour guys. The guy on the left is a Dàofěi (of course I had to google all the names). Apparently it translate as "Bandit", a name taken from their training methods. My research says that in Mandarin it should be pronounced "Tǔfěi". Not really essential data, but if I know that, now you have to know it too.

The one on the right is a Jujak, which is Korean Shock Infantry. My research on this unit has been quite frustrating as I have found almost nothing, but no doubt he looks like a tough guy.

You don't want to mess with them

Not as impressive, but don't mess with them anyway

The sniper lady is a Hùndùn, which translate as "faceless", after the evil creature from Chinese mythology who embodies chaos and confusion. The bloke with the shotgun is a Gŭiláng ("Ghost Wolf"), who are the special arctic branch of the Yu Jing Army.

I hope I'm just writing those names right

I'm not sure if those coats are practical, but of course they are cool

Finally, the Zhànshì Qízhì (Troops of the Banner), the core of the army, light infantry troopers:

I wouldn't dare to paint an Imperial Guard sized army this way, but the minis are gorgeous

Well, I really don't see those tight pants in service in the military, but that's another issue

 Yu Jing has eight separate armies, each one with their banner. The one on Svalarheima, where this Operation Kaldstrom takes place, is the White Banner Army.
I'm used to WH40K, where finding background on the units is pretty easy, but there's not that much info on this, so I'm trying my best to get the fluff. It always helps me to understand the unit itself and gives me some kind of insights when painting.
Anyway, here you have the core force painted:
 
Camouflage is clearly not an issue in this game
So these are the two forces of the core box:

I need to build a backdrop for group shots like this one!

 My pal asked for urban bases, but what you see is temporary, I will add some rubble and stuff when I have all the minis finished.
I've talked about Oktavia Grímsdóttir above, but I also have a few more minis for both sides, so this is not the last you've seen on this project!


17/06/2023

Filling the corners

 Life has got me stranded among the usual thousand ongoing projects, job issues and family, so just the usual stuff! However I'm afraid I have slowed down my output recently. I was hoping I could show much more today, but any little progress is still progress, so here I am!

Last time I talked about my board it looked this way...

This project never ends!

You can see down left there's an ugly empty space, taking shape between the foamboard and the wooden box. Of course I will not suffer empty spaces on my board!

After doing rough caves, I fancied something different, something more picturesque...

I won't blame you if you don't know what the hell is going on here

No, a swimming pool is too much, even for me

Oh. Was that unexpected enough?

Does it begin to make any sense at all?

So that's it, I'm building a refreshing corner inside the cave. I just painted it all but the doors, in the hope that it will work at first sight.

I don't need it to be perfect. I don't even need it to be good!

I simply have to create the illusion

The place is built in a similar fashion to another tiny corner I had previously done, the tea room place at the end of the first slope (you can see it on this post). For the entrance I chose not to build a raw stone cave, but an arch in the same way I had done before at the entrance of the town (check the first pic in the post):

Kind of tricky thing to do!

I hope it all looks more or less natural at table distance. However, I thought I could still add something.

So I made this plant out of paper and a broken ballpen piece

Now the corner looks cozier and fresh!

I also added some more stuff on the board, but it has nothing to do with this corner. I got these antennae from Miniature Scenery:

Pretty straightforward to assemble

In the end, after the usual white priming and dirty weathering, they look like this:

Now that I see the pic, I want to sculpt a nest on top of one of them

I also built this antennae thingie out of varied trash:

Looks awful, doesn't it?

Once painted it looks even less reliable!

I am using them to fill strategic places which were too empty:

In fact I had wanted to build this piece almost since the beginning of the project!

My other option here was a lanfing platform. This looked more feasible

This is it for today. I have plans for the next stage, but they require quite a lot of work, as I'm afraid I'll have to build different elements at the same time, because they will be interacting with each other. For now I'll leave you with the foamboard piece I just cut and that will serve as the floor for the next expansion.

This thing is growing even crazier than I ever expected

I still have a lot of sketches and numbers to do, but I have a general idea of what I want it to look like.

More to come!

01/06/2023

A jump into the infinity

 The day has arrived! After many years I've dared to dive into Infinity [you may insert a scared emoji at will]. I played Aristeia earlier this year, and I totally got the itch for the Infinity universe.

A pal of mine got the Code One: Operation Kaldstrom box, and he commissioned me to paint it. The challenge was highly motivating, as I had been toying myself with the idea of getting into the game for long. I guess there's no point in highlighting the obvious, as everybody knows by now, but... Oh, the minis! The minis!

They really are like nothing I had painted before. The whole design itself, the proportions (oh, why are those heads so small? Why are those hands so tiny? How come the guns fit into those hands??), the level of detail... It's everything about them.

The core box comes with two forces, Panoceania (galactic superpower) and Yu Jing (upcoming fierce rival). I decided to paint Panoceania first, just to get acquainted with the models.

Just seven of them. This can't be that complicated, right?

Oh my. I truly had to reinvent myself as a painter. I'm sooo used to Games Workshop, and specially to old models, that these were a totally unknown challenge to me!

First thing was to find out the correct proportions for colours on my mix. I came to this basic combo:

Crude colours, just to get my mind oriented to the final result

The minis asked for proper highlights, and it took some time for me to get them right, but in the end I was happy with the general direction of this thing:

Seriously, this guy is pure GI JOE. Change my mind

After endless trial-and-error days, I finally declared myself satisfied. This is how they were going to look like:

I finally found an use for that 00 brush!

I gave little concession to metals on the weapons. I knew I didn't want them to look like WH40K bolters, with a lot of bare metal everywhere (in fact my first instinct was to leave them totally black), but in the end I painted the magazines, barrels and so in metallics.

There are more hours involved here than those the pic suggests

Operation Kaldstrom is supposed to take place in a winter environment, so the bases should be covered in snow. However, my pal told me he didn't planned that, but urban bases, just to match his boards. Then I had to face a particular issue. This mini came with a metal piece for the base, which clearly represents open, irregular field.

Don't know what it is, but it doesn't look specially urban

So I had to improvise a solution:

No, I don't have a clue of how that beam ended there, or why. It simply exists

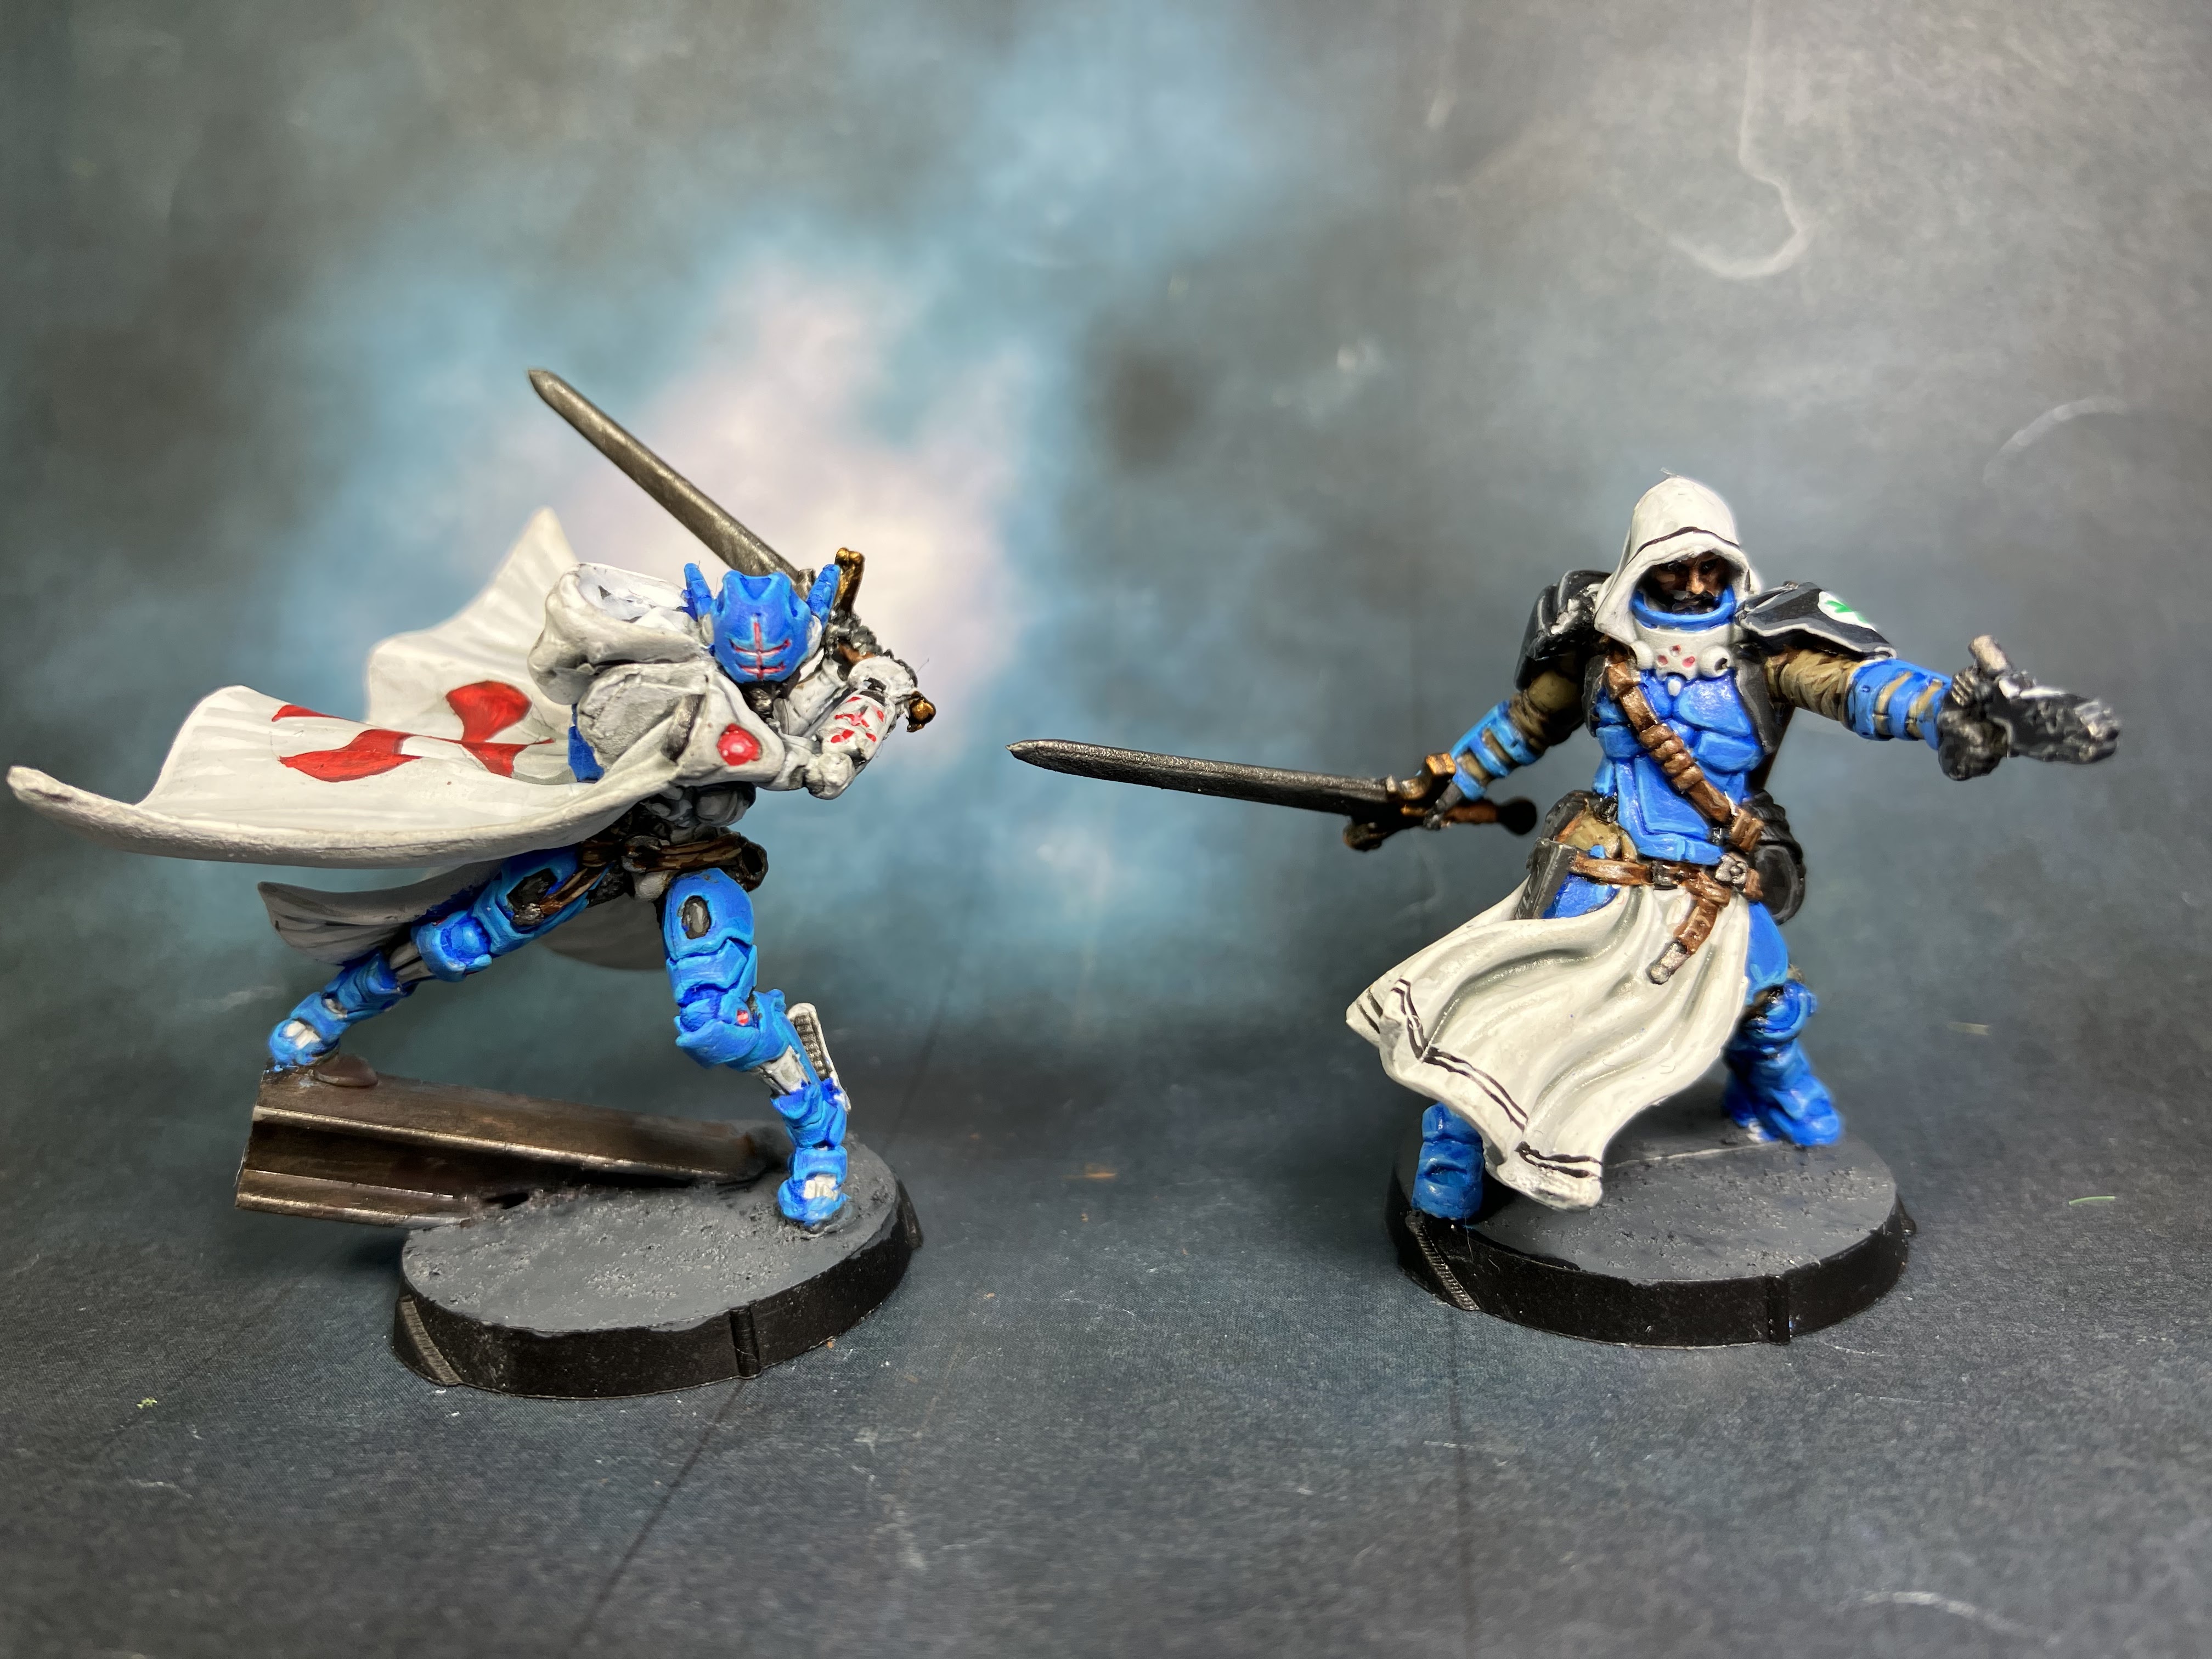
BTW, a pic of the cloak, to show the Templar cross (I'm currently not sure if that's accurate, please any background expert can tell? I've just read it's the Order of the Hospital?)

Still need to read everything about their fluff

But well, I think this covers pretty much all I did here. Let me show pics of the finished models:

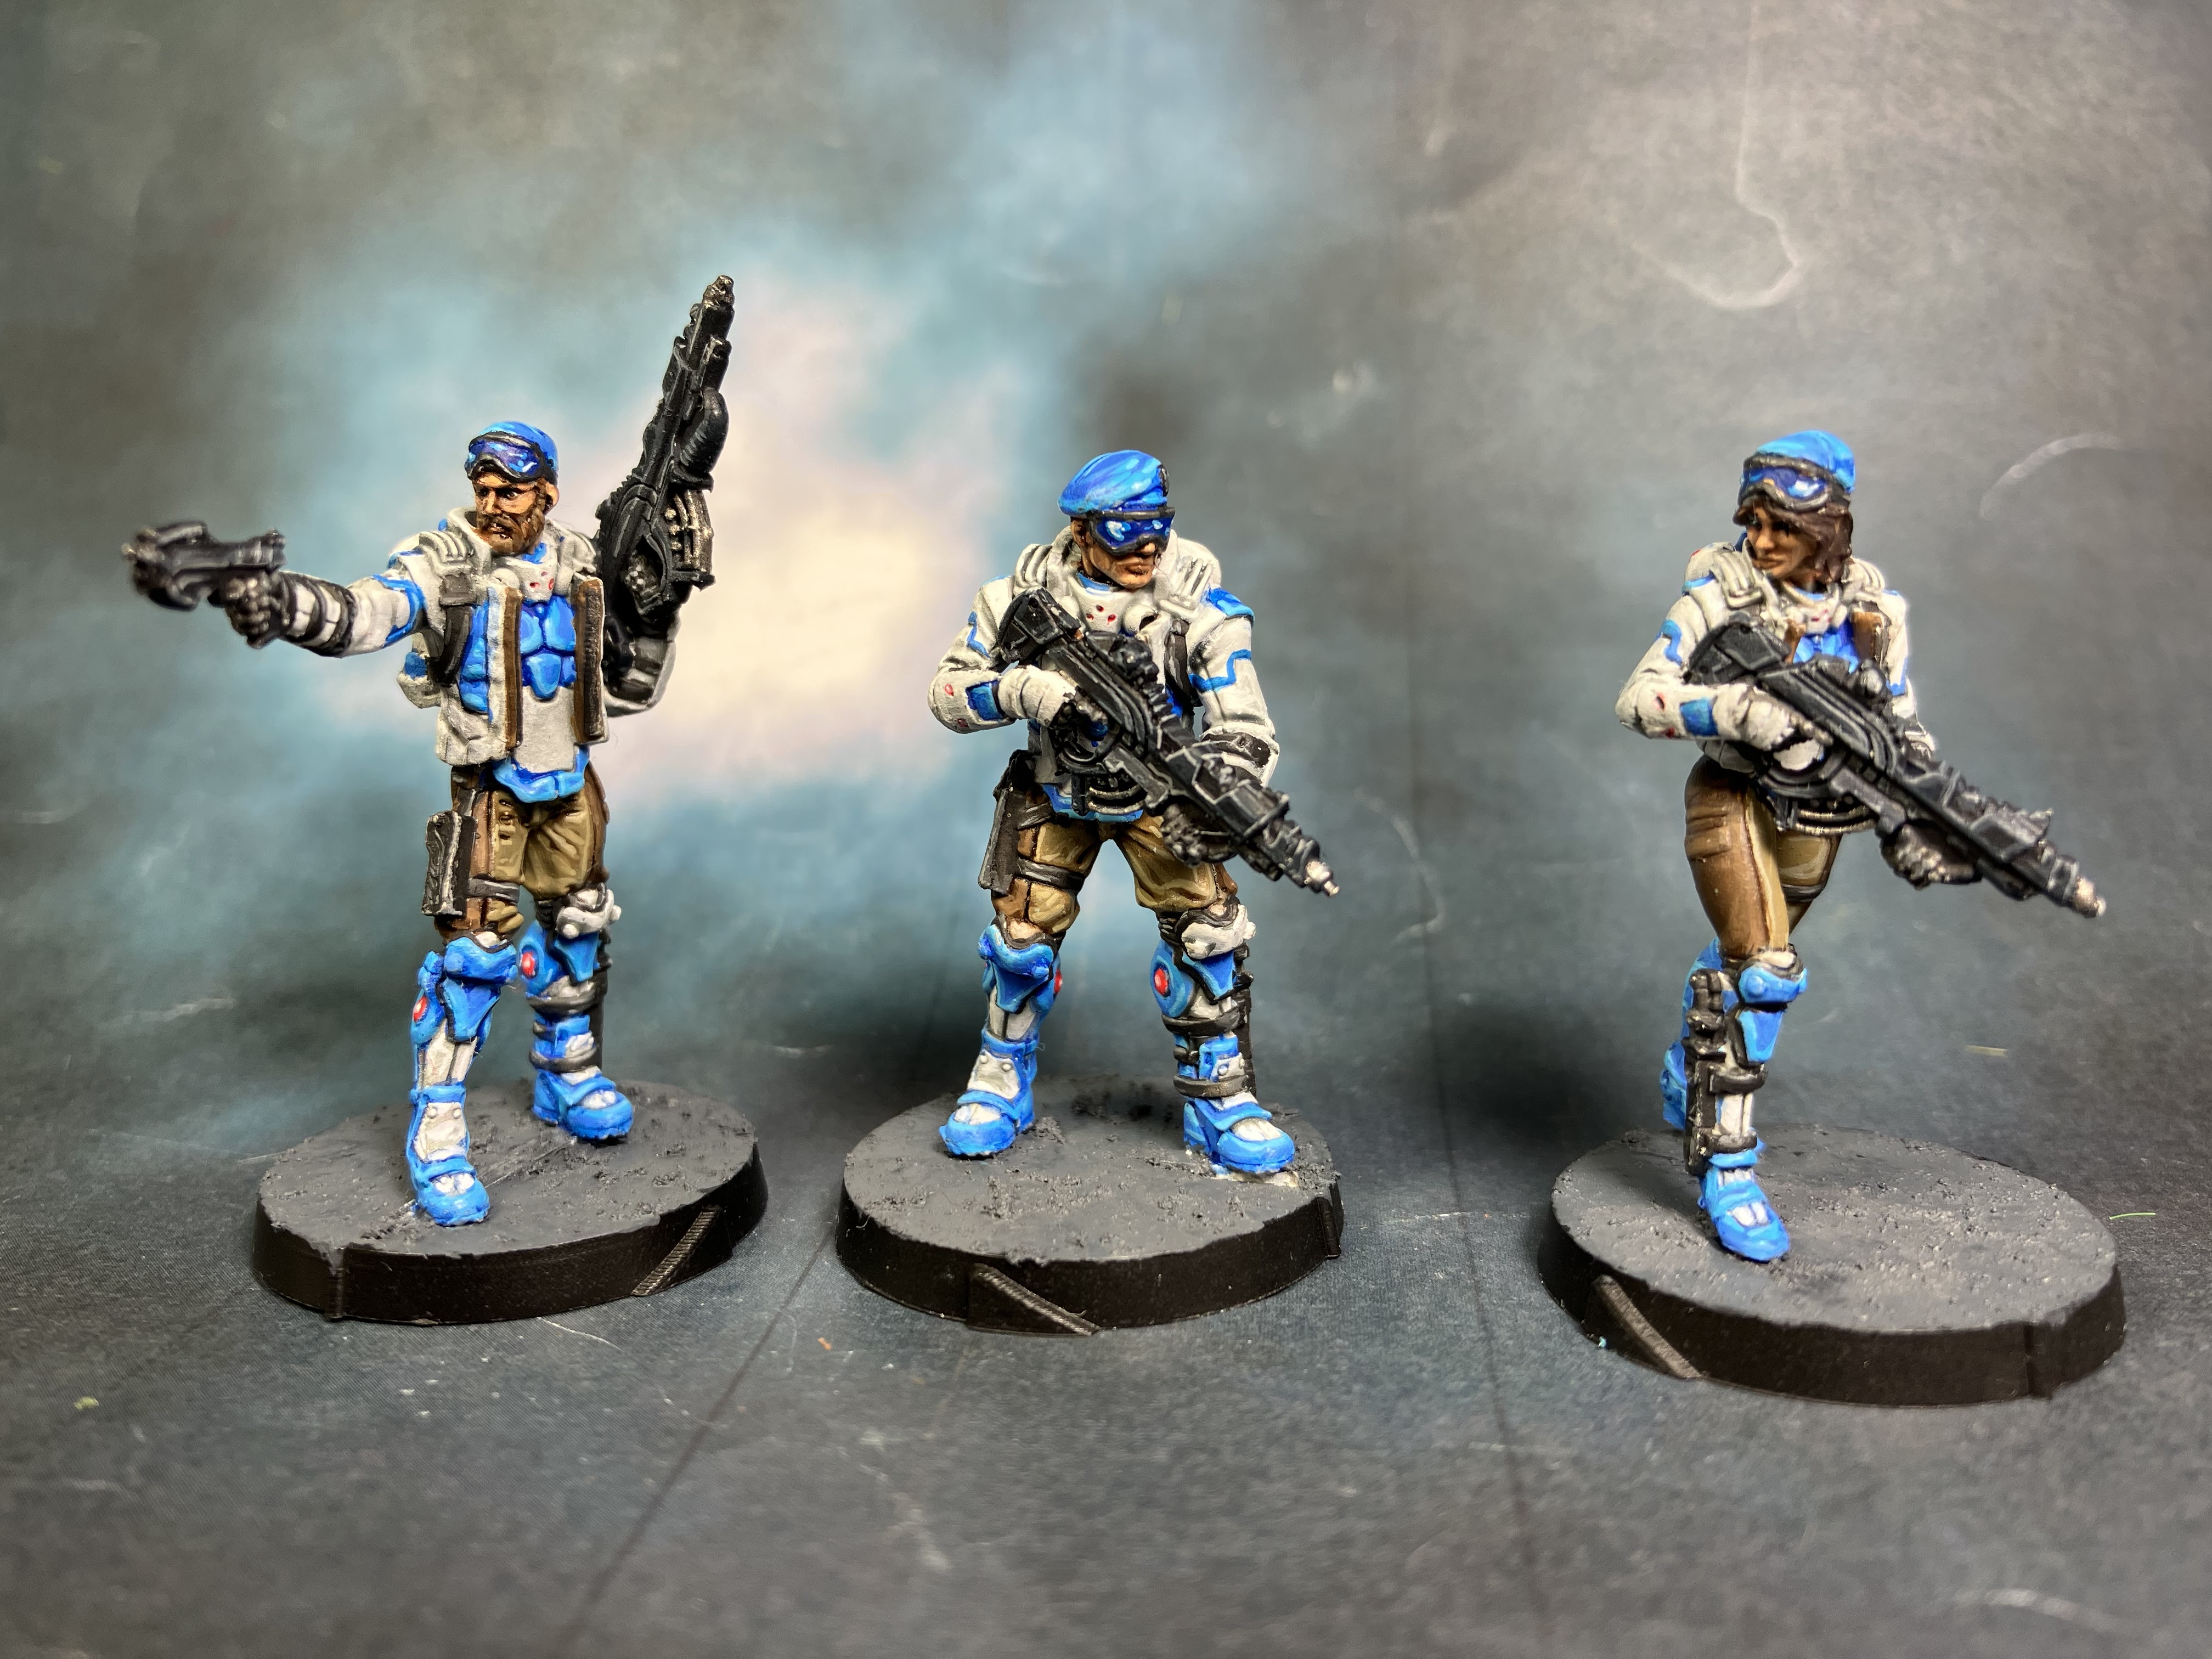
Fusiliers

Orc troop (not a Greenskin at all) and Nokken (SpecOps guys)

Knight of Justice and Infirmarer

Here you have them all:


I may still add some detail to the bases. Rubble or stuff. But for now this is it. Quite an experience! I'll breathe some air before I start the Yu Jing guys, but I don't want them to stay on the bench for long...